Reverse Osmosis Water Filters & Purifiers
Illi Water offers a wide range of advanced Reverse Osmosis (RO) systems, which can be ordered and delivered anywhere in Canada. Our reverse osmosis water filters feature compact, space-saving designs and eliminate 99% harmful contaminants. With our RO systems for homes, experience pure, clean and healthy water right at your tap.
Expert support
Reach our experts anytime, day or night
Shop Now - Pay Later
Buy today, split payments over easy months
90 Day Return
Not satisfied? Return it within 90 days
Fast and Free Shipping
Get free shipping, delivered fast and tracked
Our RO Systems are Built for Modern Homes
Our reverse osmosis water filters are designed considering the demands of today’s modern families. They are sleek, convenient to use, easily fit under the sink, and function flawlessly. Here’s why homeowners in Canada absolutely love our under-the-sink water filters.
- Low Maintenance: Our cutting-edge RO filters are extremely easy to maintain. Their streamlined design requires fewer filter changes and makes servicing straightforward.
- High Flow Rate: Our reverse osmosis systems feature a high water flow rate. With the right pressure, all your chores become easy, be it cooking, cleaning, or washing.
- Space-Saving Design: Our RO systems fit neatly under the sink and tuck in without compromising your kitchen’s aesthetics. With more space on the counter, it is easier to organize your kitchen.
- Easy Installation: All our systems are easy to install yourself and come with detailed, easy-to-follow instructions, making installation a breeze.
Compare Our Reverse Osmosis Systems
Choosing the right reverse osmosis system for your home shouldn’t be difficult. Our quick guide below makes it easier for you to compare models and features so you can pick the best reverse osmosis water filter that fits your budget, needs, and style.
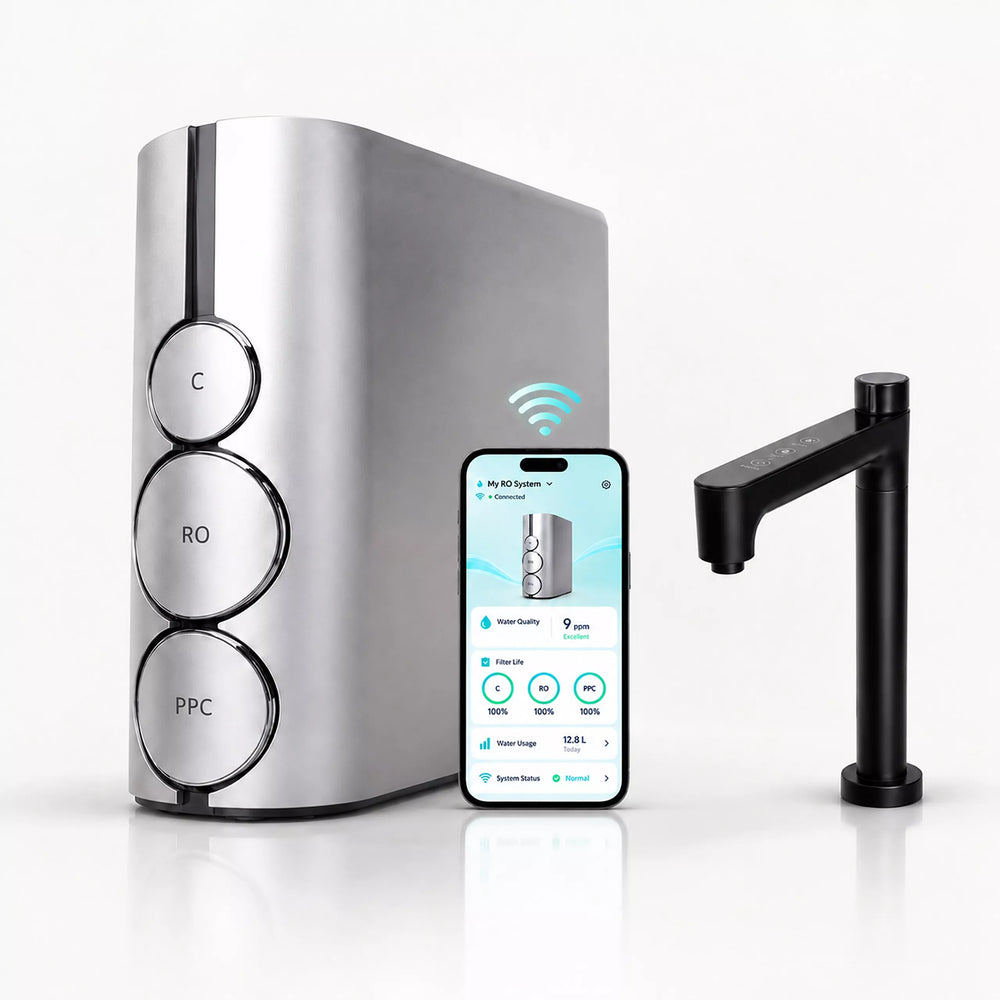
Tankless Reverse Osmosis System
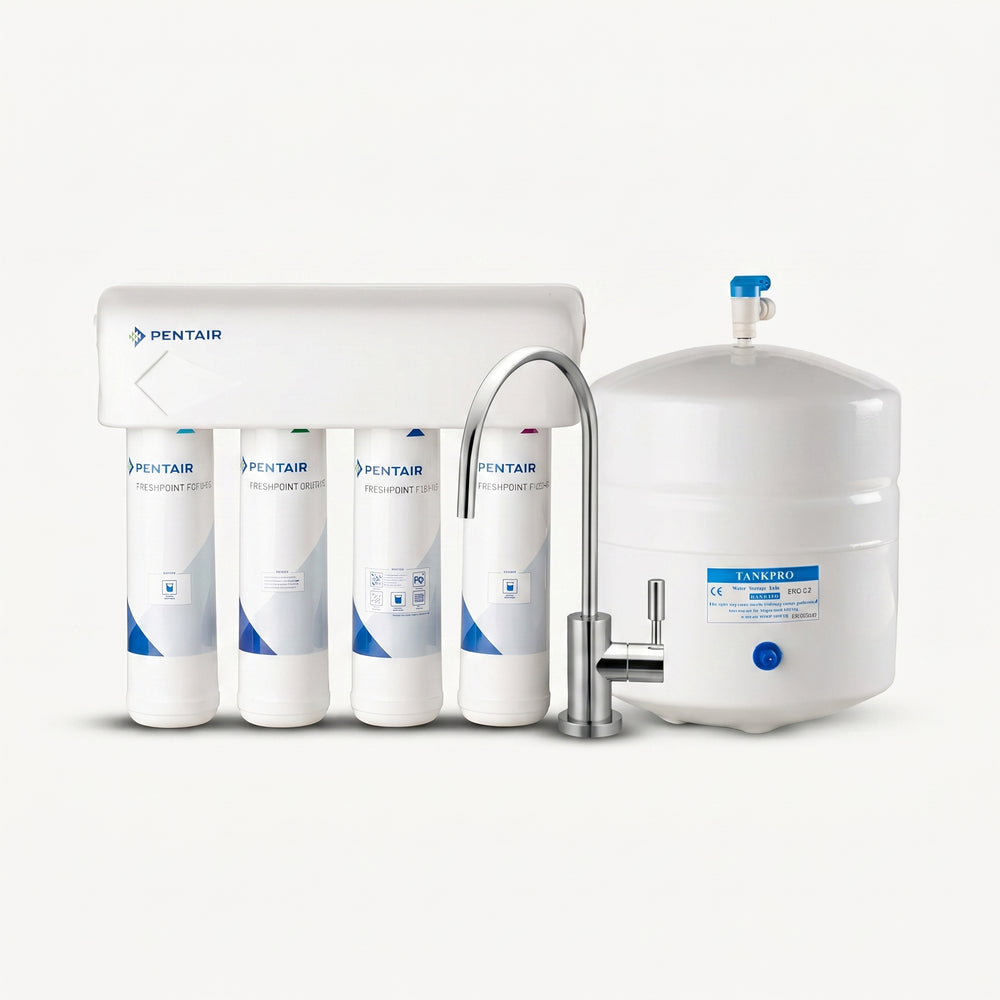
Pentair Reverse Osmosis System
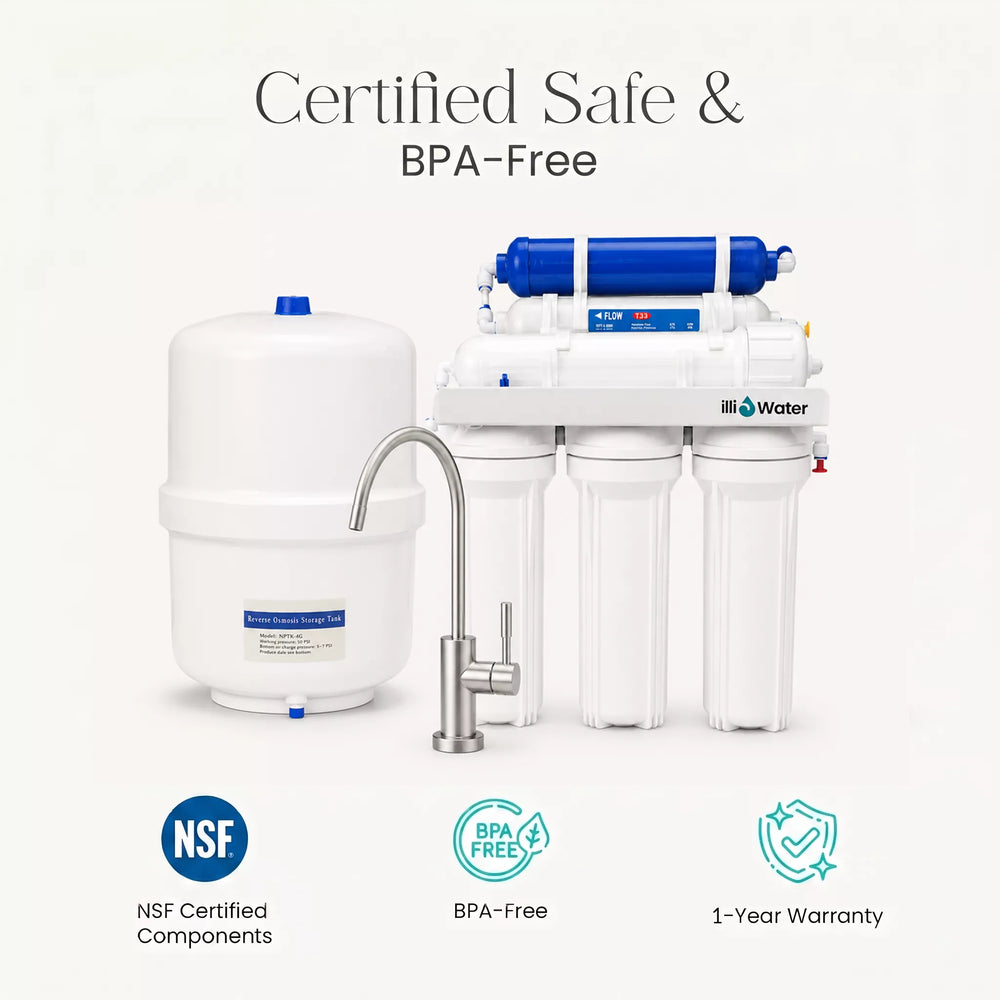
Standard Reverse Osmosis System
The Everyday Benefits of Reverse Osmosis
Illi Water’s reverse osmosis water filtration systems improve your health, lifestyle, and overall quality of life. Our systems are easy on your pocket, give you 24/7 access to fresh water, make your food and beverages taste amazing, and remove water contaminants to keep you safe.
- Improve Taste and Odour: Reverse osmosis effectively removes impurities such as sulphur and chlorine from your water, improving its taste and odour. Every sip of water, cup of coffee, and meal will always taste amazing.
- Unlimited Filtered Drinking Water at Home: RO systems ensure an endless supply of clear, clean water from your tap. You don’t have to worry about running to the store to get water again.
- Saves Money by Replacing Bottled Water: You won’t need to buy bottled water with a reverse osmosis filter. Save money, reduce your carbon footprint, and keep the environment green and fresh.
- RO Removes 99% of Contaminants: RO filters remove up to 99% of hazardous contaminants, including lead, nitrates, and other pollutants. Whether you use water for drinking, washing, or cooking, it will always be safe.
How Does Reverse Osmosis Work?
Reverse osmosis (RO) is one of the most effective water purification methods available. It works by forcing water through an ultra-fine semi-permeable membrane under pressure, leaving dissolved salts, bacteria, chemicals, and heavy metals behind — delivering exceptionally clean, safe drinking water straight from your tap.
Here’s a step-by-step breakdown of the process.
1. Pre-filtration
Before water ever reaches the RO membrane, it passes through sediment and carbon block filters. These remove larger particles like rust, dirt, chlorine, and organic compounds, protecting the delicate membrane from damage and extending its lifespan.
2. Applying Pressure
Water is then pressurized, typically by a pump, to overcome its natural osmotic pressure. This is what makes the process "reverse" osmosis: rather than water naturally flowing toward a higher concentration, pressure forces it in the opposite direction, toward greater purity.
3. The RO Membrane
This is the heart of the system. Pressurized water is pushed through a semi-permeable membrane with microscopic pores so fine that only water molecules can pass. Up to 99% of contaminants, including dissolved salts, heavy metals, bacteria, viruses, and chemicals, are blocked and left behind.
4. Separation & Drainage
The RO process creates two separate streams: permeate and concentrate. Permeate comprises purified water cleaned by the membrane, whereas the concentrate contains the rejected water, which contains the contaminants.
5. Post-Treatment & Storage
Many RO systems include a final polishing carbon filter, which removes any residual taste or odour and gives the water a clean, crisp finish. The purified water is then stored in a pressurized tank, so clean drinking water is available on demand, 24/7, without any waiting.
Certified Water Filters With Reverse Osmosis
Illi Water’s systems carry certifications to the highest global regulatory standards, guaranteeing optimal performance to surpass your expectations.
NSF/ANSI Certified
Our filters are NSF/ANSI certified, which confirms they remove toxic impurities, providing you with safe, pure water.
WQA Certified
All our filters are certified by Water Quality Association Gold Seal, which validates that our systems adhere to strict protocols for contaminant reduction, structural integrity, and material safety.
What contaminants does our RO systems Remove
Our reverse osmosis systems are built to handle the contaminants most commonly found in home water supplies so you get water that's clean, safe, and actually tastes good.
- Heavy Metals (e.g., Lead, Mercury, Arsenic): Old pipes can leach toxic metals into your water without any visible sign. Over time, exposure to heavy metals like lead and arsenic has been linked to serious health issues, including kidney and liver damage. Our system blocks these before they ever reach your tap.
- Chemicals (e.g., Chlorine, Fluoride, Nitrates): Most tap water is treated with chlorine which does its job, but leaves behind a noticeable taste and smell. Nitrates and excess fluoride are also common. Our systems filter these out, making a real difference to how your water tastes and smells day to day.
- Organic Compounds (e.g., Pesticides, Herbicides, Pharmaceuticals): Pesticides, herbicides, and other organic compounds often creep into water supplies, which can cause severe health problems, including brain and heart issues. Our filters remove these synthetic contaminants to protect your health and improve your lifespan.
- Microorganisms (e.g., Bacteria, Viruses, Cysts): Microorganisms can be present in even municipal water. Our systems have a fine semi-permeable membrane that removes these pathogens, giving you hygienic water
With multiple filtration stages working together, our systems make sure what comes out of your tap is consistently clean not just most of the time, but every time.
Why Choose Illi Water RO System For Your Canadian Home?
Illi Water is backed by Watermart a Canadian water filtration company with over 30 years of experience in the industry. That means when you buy an Illi Water RO system, you're getting decades of expertise built into every unit.
Our systems are WQA and NSF/ANSI certified, so the performance claims aren't just marketing they're independently verified. And because we stand behind what we sell, every system comes with a 5-year warranty and a 90-day satisfaction guarantee. If it's not right for your home, we'll make it right.
Clean, reliable water for your family that's what we're here for.
Blog posts
Is Reverse Osmosis the Same as Distilled Water?
You’re comparing water treatment systems, and two names keep popping up: reverse osmosis (RO) water and distilled water. Both systems are known for removing contaminants and giving you clean, purified water. The two processes aren’t interchangeable, though, so what exactly sets them apart? More importantly, which is the right choice for your needs? When aiming for highly purified water, the initial question arises: “Is reverse osmosis the same as distilled water?" In short, no. Both methods remove contaminants and enhance water quality, but with different processes. Understanding these differences first will help you choose the best solution for your drinking water requirements. Read on to learn how both methods work, their main differences, and their advantages over each other. The following details will help you decide which one is a better choice. Key Takeaways Reverse osmosis and distilled water are not the same thing, though both have gone through purification methods. Reverse osmosis uses a membrane and pressure to filter water, while distillation involves heat, evaporation, and condensation. Distillation can remove 99.9%+ of dissolved solids in water, but uses more energy than the RO process. Reverse osmosis removes 90–99% of most contaminants, which is a more practical option for household use. RO systems provide purified water on tap, while distillers produce water gradually and in batches. The Short Answer on RO vs Distilled Water Reverse osmosis and distilled water are not the same. Both will produce purified water, but with different characteristics and by using different methods. Distillation works with heat and phase changes, while RO uses pressure and membranes to block contaminants in water. The goal for both is cleaner water, but they differ in energy consumption, contaminants removed, maintenance, water waste, operating costs, and end uses. How Distillation Works Distillation is an effective form of water purification that closely resembles the natural water cycle of evaporation, condensation, and precipitation. The distillation process includes the following: Water is heated to its boiling point (100°C or 212°F). A cooling chamber captures the rising steam (leaving most contaminants behind). The steam condenses and turns back into liquid water. A separate container collects the purified water, which is pure H₂O with 99.9%+ of contaminants removed. This process removes most contaminants that have higher boiling points than water, including: Dissolved minerals Heavy metals Salts Bacteria Viruses Cysts How Reverse Osmosis Works? A reverse osmosis (RO) system utilizes pressure to push water through a very fine membrane that blocks dissolved solids in the water supply. It can reduce total dissolved solids (TDS), salts, and heavy metals from the water. This process is outlined in detail in a widely cited tutorial review about reverse osmosis. It is an excellent option for homeowners needing a continuous supply of clean, purified water for everyday cooking and drinking. Here’s how the RO process works: Water passes through a pre-filter that removes sediment like dirt and rust. The water then goes through a carbon filter that blocks chloramines, chlorine, and organic compounds. The pressure then passes the water through a semi-permeable RO membrane (measuring ~0.0001 microns), which blocks contaminants while letting water molecules through. The rejected contaminants are flushed out in the wastewater. The resulting purified water is stored in a tank. Before the water is finally dispensed to the user, a post-filter may further polish it by reducing trace impurities that can affect the taste and odor. With RO systems, you get purified water with 90-99% of contaminants removed. The membrane and pressure system also operates without heat, utilizing pre-filters and post-filters for the most polished results. When you’re weighing distilled vs. reverse osmosis, consider that RO systems produce a continuous supply of water for everyday use. Feature Comparison of Distilled Water and Reverse Osmosis Both distillation and reverse osmosis differ greatly in their working. They have different processes for removing contaminants, operating costs, maintenance issues, and outputs The following table highlights the main differences Canadian homeowners should remember when evaluating reverse osmosis vs. distilled water systems: Feature Reverse Osmosis Distillation Purification Method Pressure-driven membrane filtration Boiling and condensation Heat Required No Yes Typical Contaminant Removal 90–99% 99.9%+ Heavy Metal Removal Excellent Excellent Fluoride Removal 85–95% 99.9%+ Bacteria & Virus Removal Excellent Excellent Dissolved Minerals Removal Very High Nearly Complete Water Production Speed Continuous supply Slow batch production Typical Output Several gallons daily 1 gallon every 3–6 hours Energy Consumption Low High Water Waste 1:1 to 4:1 ratio Minimal Installation Under-sink or whole-house Countertop unit Maintenance Filter changes Regular descaling Taste Crisp and fresh Flat and neutral Household Convenience High Moderate Best Use Drinking and cooking Medical, laboratory, specialty uses Does Distilled Water Have Minerals? No, distilled water does not contain minerals. Distillation removes 99.9% of all dissolved solids, including beneficial minerals, such as calcium, magnesium, and potassium. The process involves boiling water into steam and then condensing it back. As a result, all the minerals along with other impurities are also removed. That explains why distilled water is often described as "mineral-free" or "demineralized" water, with nearly zero TDS count. Distillation Vs. RO: Which Costs More to Run Over Time? Cost and maintenance differ significantly between RO and distillation systems. RO systems require periodic filter replacements and wastewater management, while distillers use more electricity but have fewer replacement parts. Understanding long-term costs is important when comparing RO vs. distilled water for your household: Cost of a Reverse Osmosis System A reverse osmosis system costs more than basic filters, but it’s still more affordable when you look at RO water vs. distilled water setups. Let’s now glance at the usual costs of these systems: Under-sink RO systems: CAD $200–$1,000+ Premium systems with remineralization: CAD $500–$1,500+ Whole-house RO systems: CAD $3,000–$15,000+ Annual maintenance costs for RO systems range from around CAD $50-$250, depending on your system size, the model, and the existing water quality. Take a look at the maintenance recommendations for each part and schedule accordingly: Sediment filters every 6–12 months Carbon filters every 6–12 months RO membranes every 2–5 years Post-filters every 12 months Energy Consumption Since most residential RO systems don’t use electricity or heat, there’s no addition to your energy consumption. If your system needs an electric booster pump, the power requirement is still minimal when compared to heat-generating appliances. Water Waste RO systems do release wastewater, which increases your overall water consumption. However, there are modern high-efficiency RO systems with a 1:1 wastewater ratio, while standard systems have a 2:1 or 4:1 ratio. This wastewater isn’t sewage, though, so environmentally conscious homeowners may use it for several purposes, including: Flushing toilets Outdoor cleaning Watering salt-tolerant plants Cost of Distilled Water A water distiller has a lower initial cost than a premium RO system, but its operating costs are higher because of the high electricity consumption. Upfront, you may have to pay the following costs: Countertop distillers: CAD $100–$500+ Commercial distillers: CAD $500–$2,000+ For distillation, water needs continuous heating to 100°C (212°F), which translates into around 3–5 kWh of electricity per gallon of purified water. The electricity cost for a Canadian household depends on the relevant utility rates and water volume used. Water Waste Distillation is an efficient process in terms of water usage. Almost all the water in the system is purified, with minimal water waste. The output is very slow, however, with 4-6 hours required for a countertop distiller to produce one gallon of purified water. Which One Should You Choose? RO or Distilled Water? When we look at distilled vs. RO water, there is no one correct answer. Your choice depends on the planned water use, your household size, planned budget, and overall convenience. For daily cooking and drinking needs, RO is usually a better choice. It gives better-tasting water, provides several gallons per day, and is less costly to operate. Modern RO setups are also very convenient, with most models fitting under the kitchen sink. Distilled water is the best option for CPAP machines, lab use, and medical devices. For most households in Canada, an RO system makes the most sense. Industries That Commonly Use Reverse Osmosis Water Reverse osmosis provides a relatively cost-effective source of quality purified water, so it’s widely used across several industries. These include the following: Food and beverage manufacturing Breweries and wineries Restaurants and commercial kitchens Agriculture and greenhouse operations Aquariums and aquaculture facilities Hospitality and hotel industries Car wash facilities Electronics manufacturing Power generation plants Residential drinking water systems Industries That Commonly Use Distilled Water Distilled water is used when extremely high purity is necessary. You need demineralized water to prevent scaling, contamination, or damage to sensitive equipment. Here are some industries that require distilled water for their specialized applications: Pharmaceutical manufacturing Medical laboratories Research facilities Chemical processing plants Hospitals and healthcare facilities Automotive battery manufacturing Cosmetics production Sterile equipment processing CPAP and humidifier applications Scientific testing laboratories Frequently Asked Questions Is boiled water the same as distilled water? No, they are not the same. Boiling water kills bacteria but does not remove minerals, heavy metals, or chemicals from it. Distillation goes further by collecting and condensing steam into water, leaving contaminants behind. Does distilling water remove fluoride? Yes, distillation removes approximately 99.9% of fluoride. As water is boiled into steam, fluoride and other dissolved solids remain in the boiling chamber while pure water vapor rises and condenses. Can bacteria grow in reverse osmosis water? Yes, bacteria can grow in RO water if stored improperly or if the system is not maintained. RO removes the chlorine that normally prevents bacterial growth, so if you need to store water, keep it in sealed, clean containers. Does reverse osmosis waste a lot of water? Yes, traditional RO systems waste 4 to 9 gallons of water for every gallon of purified water. Advanced systems waste about 1 to 2 gallons of water for every gallon of purified water. Do reverse osmosis systems need electricity? Most under-sink RO systems function using the existing water pressure, so no electricity is required. If you have weak water pressure, an electric booster pump or permeate pump is necessary. If the water supply requires additional UV disinfection stages, it would need electricity too. Final Thoughts So, is reverse osmosis the same as distilled water? As we’ve discussed in detail, no. Both methods give you purified water, but at different levels and with different processes. RO systems are relatively more affordable and efficient enough for everyday use in most households. If you’re looking for pure water to use in specialized and sensitive applications, though, distilled water is the right choice. When you need the most practical water treatment solution, illi Water’s range of RO systems is an excellent choice for Canadian households. Check out our advanced models today and contact us to get the right system for your water quality requirements!
Learn moreHow Much Water Does a Reverse Osmosis System Waste?
You've heard that reverse osmosis gives you clean, pure water. Then you come across some information about how it wastes water, and suddenly you're hesitating. So how much water does an RO system actually waste? The truth is RO systems do produce wastewater as part of the filtration process, but the exact amount varies with system type, water quality, and maintenance. Traditional RO systems waste roughly 3–4 gallons for every gallon of purified water produced. Modern high-efficiency systems, however, have brought that ratio down significantly, some as low as 0.5:1. In this guide, we will break down exactly how much water an RO system wastes, what drives that number up or down, how different system types compare, and what you can do to reduce wastewater without compromising filtration quality. Key Takeaways Traditional RO systems waste 3–4 gallons per gallon purified; modern high-efficiency systems bring that down to 0.5:1 Waste ratio is affected by feed water TDS, water pressure, temperature, and membrane quality "Zero waste" RO is a marketing claim; wastewater is rerouted, not eliminated A permeate pump is the single most effective upgrade to reduce wastewater RO wastewater is safe to reuse for plants, floors, and toilets; it's concentrated tap water, not sewage The Short Answer on RO Water Waste A traditional RO system wastes 3 to 4 gallons of water for every 1 gallon of purified water it produces. This is referred to as a 3:1 or 4:1 waste ratio, and it's the number most commonly cited when people talk about RO inefficiency. But before that number puts you off, it's worth understanding what RO wastewater actually is. It's not sewage or contaminated water in the traditional sense. It's concentrated tap water, the same water that entered your system, but now carrying a higher load of the minerals, salts, and heavy metals that the membrane rejected. This concentrated water is flushed to the drain rather than your tap, which is where the "waste" comes from. Is That Actually a Lot of Water? The waste ratio can feel alarming if you focus on the numbers alone. But context changes the picture entirely. Say a family of four drinks about 2 gallons of RO water per day using a system with a 4:1 ratio. Their system wastes roughly 8 gallons daily. That sounds significant until you compare it to other uses requiring water. A 10-minute shower uses 20 to 25 gallons of water, a toilet flush uses 1 to 3 gallons of water, and a load of laundry uses 15 to 40 gallons. Simply put, the water your RO system wastes every day is quite less compared to what a single shower wastes. For the vast majority of Canadian homes, this is a modest trade-off for pure and safe drinking water. Still concerned? Consider getting a high-efficiency system with a permeate pump to reduce wastewater to 1:1 or even 0.5:1. This lowers that daily footprint to just 1–2 gallons of waste. What Affects the RO Waste-to-Pure Water Ratio? The waste ratio of any RO system isn't fixed; it varies based on your water supply, your home's plumbing conditions, and the components inside the system itself. Here are the three main variables: Feed Water Quality (TDS, Hardness, and Contaminant Load) The quality of water entering your RO system, called feed water, directly affects how hard the membrane has to work. Water with high total dissolved solids (TDS) or high hardness contains more contaminants for the membrane to reject. To prevent scaling and fouling, the system flushes more water to the drain, which pushes the waste ratio higher. Conversely, municipally treated water with lower TDS levels puts less strain on the membrane, resulting in a lower waste ratio. In many Canadian cities where municipal water is already treated and relatively low in TDS, homeowners often see better efficiency than the worst-case 4:1 ratio suggests. Operating Conditions (Water Pressure and Temperature) Water pressure plays a significant role in RO efficiency. Most systems are designed to operate between 40 and 60 PSI. When incoming pressure falls below 40 PSI, the membrane can't push water through at its rated speed, so the system runs longer and wastes more water per gallon produced. A booster pump is the standard fix for low-pressure homes. Water temperature is equally important and particularly relevant in Canada. Cold water is denser and moves through the RO membrane more slowly. Water below 10°C (50°F), common in Canadian winters, can significantly increase waste ratios because the membrane's flow rate drops while the flush cycle stays the same. If your cold water line runs through an unheated space, this is worth adding to your efficiency factors. System Components (Membrane Type, Flow Restrictor, and Maintenance) Not all RO membranes perform equally. High-rejection membranes, such as those made by Filmtec, are engineered for better recovery ratios, meaning they extract more purified water per cycle and send less to the drain. The flow restrictor, a small, often overlooked component, controls the balance between purified water output and wastewater. An incorrectly sized restrictor can push waste ratios well above what the membrane is capable of. This is one of the most common causes of unexpectedly high wastewater in otherwise high-quality systems. Finally, maintenance plays an equally important role as the water quality, impurity levels, and other factors do. Clogged sediment or carbon prefilters force the system to work harder and run longer, increasing wastewater over time. An aging membrane that's past its replacement window loses rejection efficiency, which also raises the waste ratio. Keeping up with filter and membrane replacements isn't just about water quality; it directly affects how much water your system uses. Typical Waste Ratios by RO System Type Different RO system designs produce very different waste ratios. Here's how the most common types compare: RO System Type Purified Water Wastewater Waste Ratio Traditional Tank-Based RO 1 gallon 3-4 gallons 3:1 to 4:1 High-Efficiency RO (with permeate pump) 1 gallon 1-1.5 gallons 1:1 to 1.5:1 Tankless RO System 1 gallon 0.5-1 gallon 0.5:1 to 1:1 Commercial/Whole-Home RO 1 gallon 2-3 gallons 2:1 to 3:1 Newer systems, such as Illi Water's Pentair RO systems, achieve lower waste ratios through advanced membrane technology and built-in permeate pumps, making them a significantly more efficient option than older tank-based designs. Zero Waste RO Systems: The Truth Behind the Claim If you've been searching for RO systems, you've likely come across "zero waste" marketing. It sounds ideal, clean water with no waste at all. But the reality is different from all the marketing claims. The claim: Some systems advertise zero-waste RO filtration, implying no water goes to the drain. The reality: No RO system produces zero wastewater. What "zero waste" systems actually do is reroute the concentrate away from the drain and into your hot water line, feeding it back to your water heater instead. The water isn't eliminated; it's redirected. You're still "using" it, just elsewhere in your plumbing. The trade-off: Routing mineral-concentrated wastewater into a tankless water heater is a problem. That concentrated water accelerates scaling inside the heater, shortening its lifespan and potentially voiding warranties. Most plumbers only recommend zero-waste kits for homes with traditional tank-style water heaters and already-soft water supplies. The bottom line: "Zero waste" is a marketing term, not a reality. If water efficiency is your genuine concern, a system with a permeate pump or a tankless design delivers real, measurable reductions in wastewater without the plumbing trade-offs. How to Reduce RO Wastewater: 5 Most Effective Methods The wastewater your RO system produces isn't something you can control. For users who are either optimizing an existing system or buying new, there are practical, proven steps that can cut their waste ratio significantly, without spending much at all. Here are the five most impactful things you can do. Install a Permeate Pump (Most Effective) A permeate pump is the single most impactful upgrade for a traditional tank-based RO system. It works by using the hydraulic energy of the outgoing wastewater stream to push purified water more efficiently into the storage tank. The result is a significant reduction in waste, from a typical 4:1 ratio down to as low as 1:1, without requiring any electricity. For homeowners who already own a tank-based system, adding a permeate pump is the fastest and most cost-effective way to improve efficiency. Add a Booster Pump (If Pressure Is Low) If your home's incoming water pressure runs below 40 PSI, your RO system is almost certainly wasting more water than it should be. A booster pump increases operating pressure to the 60–80 PSI range, which improves membrane performance and can reduce wastewater by up to 50%. This is especially relevant for Canadian homes on well water systems or those in areas with lower municipal supply pressure, where underpressure is a common and underdiagnosed problem. Replace Filters and Membrane on Schedule One of the simplest ways to keep waste ratios in check is to stay on top of routine maintenance. Sediment and carbon prefilters should typically be replaced every 6–12 months, and the RO membrane every 2–3 years, depending on water quality and usage. Clogged pre-filters force the system to compensate by running longer flush cycles, while an aging membrane loses its rejection efficiency and allows the system to waste more water chasing adequate purification. Maintenance isn't just about water purity; it directly controls how efficiently your system operates. Knowing how often you should replace your water filters can help you save on your system and water wastage. Reuse RO Wastewater Around the Home You may not be able to reduce the waste ratio at the membrane level, but you can put that water to use rather than letting it disappear down the drain. RO wastewater is concentrated tap water, higher in minerals than normal, but not contaminated in any sewage sense. It can be used effectively for watering non-edible plants, mopping hard floors, flushing toilets, or outdoor cleaning tasks like washing down patios or vehicles. Just don't use RO wastewater for drinking, aquariums, delicate fabrics, or edible garden plants, as the higher mineral and contaminant concentration can cause harm in those use cases. Upgrade to a Tankless or High-Efficiency RO System If you're in the market for a new system rather than optimizing an existing one, choosing a tankless RO system or a high-efficiency model with a built-in permeate pump is the most simple way to lower waste. Tankless RO systems produce water on demand rather than pre-filling a storage tank, which eliminates the back-pressure that forces traditional systems to flush more wastewater. These systems routinely achieve 0.5:1 to 1:1 ratios, making them two to four times more efficient than conventional tank-based models right out of the box. Frequently Asked Questions Does a reverse osmosis system waste a lot of water compared to other appliances? In absolute terms, a traditional RO system uses more water per unit output than most household appliances. However, it only produces drinking and cooking water, a small fraction of total household use, so its overall impact on your water bill is typically modest. How much water is wasted per gallon of RO water? Traditional systems waste 3-4 gallons per gallon purified. High-efficiency systems with permeate pumps waste 1-1.5 gallons, and tankless systems waste as little as 0.5 gallons per gallon of purified water produced. Is RO wastewater harmful to the environment? RO wastewater from residential systems is concentrated tap water, not toxic or chemically dangerous. When discharged to municipal drain systems in normal household quantities, it poses minimal environmental concern. It becomes more of an issue at a commercial or industrial scale. Can I bathe with RO wastewater? Yes, RO wastewater is safe for bathing, cleaning, and general household use. It has a slightly higher mineral concentration than tap water, but it is not harmful to the skin. It's simply not suitable for drinking, aquariums, or sensitive plant care. The Bottom Line Traditional RO systems waste 3–4 gallons per gallon purified; that's the number that concerns most people. But modern high-efficiency systems have brought that down to 1 gallon or less, and the gap continues to narrow as membrane technology improves. If water efficiency matters to you, the answer isn't to avoid RO. It is to choose the right system. A permeate pump, a booster pump, or a tankless design can transform your system's waste ratio from a concern into a non-issue. And in the meantime, that concentrated wastewater doesn't have to go down the drain; it can go to your plants, your floors, or your toilet tank. RO is still the most effective residential filtration technology for removing lead, heavy metals, and dissolved contaminants from drinking water. For Canadian homeowners weighing the trade-off between water purity and water efficiency is quite significant. If you are also concerned about water waste? illi water offers high-efficiency RO systems with permeate pumps and low waste ratios designed for Canadian homes. Check our complete range today or call us now to discuss your concerns.
Learn moreWhy Is Reverse Osmosis Water Acidic? The Science Explained
You installed a reverse osmosis (RO) system for cleaner, safer water. You check the pH and find out it is between 6.0 and 6.5. But isn’t that acidic? Possibly you panic, wondering if something is wrong and your water is unsafe. Let’s calm you down. Slightly acidic RO water (pH 6.0–6.5) is completely normal and completely safe. It is actually a good sign, meaning your system is working just fine. The reason why reverse osmosis water is acidic is that the RO membrane removes 90–99% of alkaline minerals like magnesium, bicarbonate, and calcium that act as natural buffers for water when its pH drops. Without these buffers, purified water is unable to resist the slight acidity that occurs when it absorbs carbon dioxide from the air. We’ll be going into more detail behind this concept in this article. It talks about why RO water is acidic, gives you an understanding of the pH scale, highlights factors that affect the RO water’s pH, and discusses how acidic RO water affects your health. Key Takeaways RO water typically tests between pH 5.0 and 6.5. It is slightly acidic but completely normal and safe to drink. This acidity indicates your system is working just fine and there isn’t any flaw. The acidity of RO water is rooted in chemical facts. RO removes 90–99% of alkaline minerals (calcium, magnesium, bicarbonate) that act as natural pH buffers. With no buffers, purified water cannot resist the acidity created when it absorbs CO₂ from the air to form carbonic acid. Your body holds its pH balance steady regardless of what you drink through homeostasis. What you drink has zero impact on your blood pH. Health organizations like WHO, Health Canada, and the EPA have set pH limits between pH 6.5 and 8.5 for corrosion control and taste improvement, not for health. If you prefer neutral or alkaline water, introduce a remineralization filter to your RO system. It restores minerals in the water, raises pH to 7–8, and improves taste. The Short Answer on RO Water and pH RO water is acidic due to two main reasons. First, the RO membrane removes 90–99% of minerals like magnesium, bicarbonate, and calcium (also known as pH buffers for water) that are alkaline in nature. When they are discarded from the water, its pH naturally drops. Second, CO₂ from the air dissolves in the water and creates carbonic acid, which further lowers the water’s pH. As the RO water has no pH buffers, its pH then remains slightly acidic. What the pH Scale Means The pH scale, ranging between 0 and 14, measures the acidity or alkalinity of a substance. It has three main categories: Acidic: Wondering, what is the acidic pH range? If something has a pH between 0 and 6.9, it is acidic. Lemon juice is acidic and has a pH of 2.0. Neutral: If something has the pH of exactly 7, it is considered neutral. Pure water has a pH of 7. Alkaline/Basic: If something has a pH above 7, between 7.1 and 14, it is basic. Baking soda has pH 9 and is basic. The pH scale is logarithmic, similar to the Richter scale for earthquakes. A one-point drop or increase in the pH brings a tenfold change. So a pH of 4 is ten times more acidic than a pH of 5, but the latter is more alkaline than the former. A pH of 12 is ten times more alkaline than pH 11, and the latter is more acidic than the former. Typically, Canadian municipal water lies between pH 6.5 and 8.5, depending on the water source and treatment. Municipal water treatment plants usually add chemicals to water to raise its pH. As the water becomes more alkaline, it prevents pipe corrosion and protects the infrastructure. However, when the city water passes through an RO system, the filtration process strips away the additional minerals from it. Why pH Alone Doesn't Tell You if Water Is Safe Often, people equate the word ‘acidic’ with 'dangerous.' When they notice that RO water has a low pH, they instantly panic, assuming it is unsafe too. pH only gauges a substance’s acidity or alkalinity, not contamination or purity. Lemon juice is acidic too, but nobody complains about how toxic that is. Low-pH water can be perfectly clean and safe as well. Usually, distilled water has a pH of 5.8. However, high-pH water can be toxic, like lye at pH 13 is extremely caustic. Safety depends on the cause behind the pH shift, not the precise pH number. In the case of RO water, the low pH comes from the dissolved CO₂ (carbon dioxide), which is harmless in that form, and the absence of minerals that raise the pH. Why Reverse Osmosis Water Becomes Acidic? (The Science) RO water turns acidic through a combination of natural chemical reactions and mineral removal. Let’s walk you through the science behind it. Removal of Alkaline Minerals (Calcium, Magnesium, Bicarbonate) Natural water contains alkaline minerals, such as bicarbonate, calcium, potassium, and magnesium, that act as natural buffers in water. They neutralize acids and keep the water’s pH stable above 7. Think of these minerals as a ‘pH shield.’ RO membranes eliminate approximately 90–99% of these minerals during filtration. With no mineral buffers, the water cannot resist pH fluctuations. This is basically a sign your RO filtration system is doing its job properly and isn’t a design flaw. So if you are thinking, does reverse osmosis make water acidic? The answer is yes, the RO process does that. Dissolved Carbon Dioxide Forms Carbonic Acid The acidity in water basically arises when CO₂ from the air dissolves into water, forming carbonic acid (H₂CO₃). The equation below shows this reaction: H₂O + CO₂ → H₂CO₃ In mineral-rich water, bicarbonates absorb this carbonic acid, neutralizing it, which keeps the pH stable. But RO water is devoid of minerals; hence, there is no buffer to neutralize the carbonic acid. The carbonic acid stays in the RO water, lowering pH to 5.5–6.5. This is the same science that explains why rainwater is naturally acidic with a pH of 5.6. Pure water absorbs CO₂ from the atmosphere. Purer the water, the more CO₂ it can absorb, and the more acidic it turns. Low TDS Means No Buffering Capacity Total dissolved solids (TDS) refers to the total concentration of dissolved salts and minerals in water. Typically, tap water has 150—500 TDS, and RO water has 10—50 TDS. Buffering capacity refers to the water's ability to resist pH changes. RO water has a very low TDS count, so it is basically mineral-free. In the absence of minerals, it cannot absorb acidic compounds. When RO water absorbs the slightest amount of CO₂, it results in a significant drop in the pH. This isn’t a health hazard, just normal chemistry. Why Your RO Water Tests More Acidic Than It Is Your RO water tests more acidic than it should be? That’s probably due to the different factors that influence its pH, such as the source water’s quality, air exposure, storage conditions, and inclusion of remineralization stages in the RO system. The table below gives a quick overview of these factors. Factor Effect on pH What to Do Source water alkalinity Higher alkalinity equals higher pH Test your tap water as a baseline Air exposure More CO₂ = lower pH Test immediately; use airtight containers Storage conditions Plastic allows CO₂ permeation Use glass or stainless steel Remineralization Adds minerals = higher pH Replace cartridge every 6-12 months Membrane age Older membrane = higher pH (less pure) Replace the membrane every 2-3 years System pressure Higher pressure = lower pH (purer water) Maintain 40-60 PSI; use booster pump if needed Source Water Quality Your incoming tap water’s pH and alkalinity directly impact your RO water's final pH. If the source water is more alkaline (due to addition of more dissolved minerals and bicarbonates), the final RO water will also have a slightly higher pH because some buffering minerals remain in the water even after filtration. In Canada, the Prairies, South Saskatchewan, North Saskatchewan, and regions in northern Alberta and the Northwest Territories have municipally treated water with high pH, ranging from 7.95 to 8.63. Conversely, water with naturally low alkalinity, common in areas with soft water or those that have well water sources, produces RO water with low pH. Atlantic Canada and regions in Northern Ontario have low pH source water. Data collected from the survey of drinking water plants in Canada shows that the Newfoundland-Labrador drainage region’s water has the lowest average pH of 6.30. Check your tap water’s pH prior to installing a reverse osmosis system. If the tap water’s pH falls below 7.0, your RO water is likely to have a pH between 5.0 and 6.5. This way, you have a baseline for comparison and won’t go into undue stress on seeing your RO water’s low pH. Air Exposure Air exposure is a direct, immediate, and significant factor that influences the RO water’s pH. Pure water attracts carbon dioxide. The instant RO water leaves the membrane and comes in contact with air, CO₂ starts dissolving in it. The result? Carbonic acid, which you already know, drops the water’s pH. In just an hour, a fresh glass of RO water’s pH drops from 7 to 5.5, or even lower at times. Your RO water’s pH reading depends largely on when and how you test. Draw water directly from the system’s storage tank and test it immediately, and the reading will be higher compared to that of the RO water sitting in an open glass for 60 minutes. Testing pH at the tap? Use a fresh sample of water and test its pH quickly. Testing water that has been stored for quite some time? Expect a lower pH reading, and instead of fretting, know it is normal and not at all a sign of contamination. Storage Conditions How and where you store the reverse osmosis water substantially influences its pH over time. Plastic storage tanks, common in older RO systems, can allow CO₂ to seep through the material over hours or days. Gradually, the water’s pH lowers. The water's temperature also plays a role. Cold water can hold more dissolved CO₂ compared to warm water. This explains why RO water in refrigerated storage has a lower pH. If you prefer RO water with a higher pH, do the following: Store the RO water in airtight glass or stainless steel containers instead of plastic containers. Minimize headspace (air gap) between the water and the container's lid to minimize CO₂ exposure. While refrigeration does slow bacterial growth, it does not prevent CO₂ absorption. For daily use, draw fresh water from your system instead of getting stored water. If you notice your stored water tastes flat or slightly acidic, it is not a quality issue, just CO₂ doing what it’s supposed to do. Remineralization Stages Some RO systems, such as illi water’s tankless reverse osmosis system, include a post-filtration remineralization cartridge that adds back alkaline minerals, including calcium and magnesium, to the water after it has passed through the RO membrane. The RO water regains its buffering capacity, slightly alkaline and refreshing taste, and its pH rises to between 7.0 and 8.5. If your RO unit has a remineralization filter, your RO water’s pH will be higher than that of a standard system. The remineralization filters deplete over time, demanding replacement every 6 to 12 months, depending on usage. As the cartridge becomes exhausted, you may notice the water’s pH gradually dropping. This indicates it is time to replace the filter. And if your reverse osmosis water is acidic, but you prefer alkaline or neutral water, customize your RO system with a remineralization filter. Membrane Age and Condition As an RO membrane grows older, its rejection rate for dissolved minerals slowly declines. Older membranes may allow relatively more calcium, magnesium, and other minerals to pass through. These minerals improve the water’s buffering capacity and also increase its pH compared to a fresh membrane. However, a rising pH over time is not necessarily a good sign. It points to your system’s aging membrane, which loses its effectiveness with time and lets more dissolved solids enter your water. The water will be less acidic, but it will also be less pure. Replace your system’s RO membrane every 2 to 3 years to get optimal contaminant removal as well as predictable pH performance. System Pressure and Flow Rate RO systems demand a water pressure between 40 and 60 PSI to effectively push water through the RO membrane. Pressure below 40 PSI obstructs the membrane’s capacity to discard dissolved minerals, letting more ions, including alkaline minerals, seep through. The pH readings start becoming higher, and so do the water’s contaminant levels. On the contrary, optimal pressure between 40 and 60 PSI improves the rejection rates, generating purer water with lower pH. If you have high water pressure in your house or you have installed a booster pump with your RO unit, the reverse osmosis water will typically be purer and test lower on pH. It is a sign of efficient filtration. Got low pressure in your house, possibly due to older plumbing, or maybe your main water source is a well? Consider getting a booster pump to improve the system’s efficiency and contaminant removal. Pressure fluctuations cause pH variations. When the pressure becomes consistent, so does the pH. What pH Should You Expect From RO Water? Typically, the pH range of RO water is 5.0—6.5. The table below gives a quick breakdown of the pH range of different types of reverse osmosis waters. Water Type Typical pH Range Fresh RO water 5.0 – 6.5 RO water after CO₂ absorption 5.0 – 5.5 RO water with remineralization 7.0 – 8.5 Typical Canadian tap water 6.5 – 8.5 Fresh RO water has a pH of 5.0—6.5. The pH drops when it absorbs CO₂. Add back minerals to RO water as done by certain reverse osmosis systems with additional remineralization stages, and the pH rises to 7.0—8.5. If your RO water’s pH drops to below 5.0, that is definitely concerning. It is likely indicative of membrane issues, problems with your water source, or low feed water pressure. If the pH is 6.5, it is likely because your system has a remineralization stage, or because your feed water is unusually alkaline. The exact pH reading of reverse osmosis water depends on several factors, which we’ll be discussing below. Is Acidic RO Water Safe to Drink? Yes, acidic reverse osmosis water is completely safe to drink. Homeowners worried about this concern can rest easy now. Let’s take a look at its safety aspect. What Health Experts Say About Low-pH Water The WHO, Health Canada, and the EPA do not set a minimum pH for drinking water safety. Health Canada’s operational guideline for the pH of finished drinking water falls in the range of 7.0 to 10.5. They have set this range to control corrosion in pipes and protect them. It does not relate to health. pH below 6.5 is likely to rust or corrode metal plumbing, which increases the risk of leaching metals such as zinc, copper, or lead into the water. That would be dangerous. Slightly acidic RO water? Not so much. The World Health Organization recommends a pH range of 6.5 to 8.5 for drinking water. WHO explicitly states that the pH of drinking water is ‘not directly linked to consumer health concerns.’ Their range exists primarily to control corrosion and improve the aesthetics, primarily taste, of the water. The U.S. EPA sets a secondary (non-enforceable) standard of pH of water between 6.5 and 8.5. This standard is for cosmetic effects, such as skin or tooth discoloration, and/or aesthetic effects, such as taste, odor, or color, and not at all for health. Does Acidic Water Affect Your Body's pH Balance? No, acidic water does not affect your body’s pH balance at all, and neither is acidic water bad for you. Your body maintains blood pH at precisely 7.35 to 7.45 irrespective of what you drink. This phenomenon is known as 'homeostasis,' a self-regulating process by which your body maintains internal stability while constantly adjusting to variations in external conditions. Your stomach acid is pH 1.5-3.5, which is far more acidic than RO water. Whenever you drink acidic water, your stomach instantly neutralizes it before it makes its way to your bloodstream. You may have come across statements like you must balance your pH. These are all ‘alkaline marketing’ claims. Your body is capable of stabilizing its own pH perfectly without any help from the water you drink. When Should You Be Concerned About Water pH? pH alone is not a direct health concern, but there are specific scenarios where the pH of RO water matters: pH below 4.0: Yes, that would be unusual and is likely to point to membrane failure or chemical contamination. Get a water test, and have a professional check your system. Corrosive water (pH <6.5) in metal plumbing: Low pH tends to release lead or copper from old plumbing pipes. If you have lead or copper plumbing in your home, consider a corrosion inhibitor for the pipes or a remineralization filter in your RO system. Unusual cloudiness or taste: pH is not the real concern you need to worry about if you notice your water tastes different or becomes cloudy. Look for other signs of contamination. An unpleasant odor or taste suggests your water has high chlorine levels. A metallic taste indicates there may be metal contamination. Cloudiness points to sediment. And if the water results in limescale formation or leaves spots on your appliances and dishes, you may have hard water issues. For most Canadian homes with stainless steel or PEX plumbing, the pH of RO water is not an issue. Two Myths Worth Clearing Up Misconceptions have surrounded RO water for quite long. Let’s debunk two of the most common myths. Myth #1 Acidic Water Causes Health Problems Like Acid Reflux or Bone Loss No, it does not. In fact, acid reflux is caused when the stomach acid escapes into the esophagus. Drinking acidic water does not cause acid reflux. And the cause of bone loss? That’s due to dietary calcium deficiency, not drinking water that lacks calcium. RO water only removes minerals from water; it does not affect the minerals in your body. Myth #2: Alkaline Water Is Always Better Promoting alkaline water nowadays is more of a marketing trend. It is not a medical necessity. Your body is fully capable of regulating its own pH perfectly. While drinking alkaline water may help some people struggling with acid reflux, there are no proven health benefits for the general population. Neutral or slightly acidic water is perfectly healthy, as proven by this 2022 systematic review published in Reviews on Environmental Health. Marketers also claim alkaline water is better, stating how RO leaves dead water, which again is a myth. Reverse osmosis does eliminate 90-99% of contaminants from water, but it also strips the water of many minerals. However, what we forget is that we get 99% of our daily minerals from food, not water. A glass of milk provides us with more calcium than 100 gallons of tap water. RO water is not dead at all, it is pure, clean H₂O. If you are concerned about your health, eat a balanced diet or add a remineralization filter to your RO system. How to Raise the pH of RO Water (If You Want To) Still prefer drinking neutral or alkaline water? Well, you have the right to. Here are the best options to increase the pH of water produced by RO systems. Install a Remineralization Filter This is the best available solution to raise your RO water’s pH. A remineralization cartridge rejuvenates minerals, such as calcium and magnesium, in the RO water. The pH of the water rises to between 7 and 8, and its taste also improves remarkably. Use an Alkaline Filter Stage You can add an alkaline filter to your RO water filtration system. These filters use magnesium oxide or calcium carbonate to increase the water’s pH. Some alkaline filters even use electrolysis or ceramic balls. Their effectiveness varies by brand. Choose a reputable brand, and remember that like other filters, alkaline filters too exhaust over time and need replacement every 6 to 12 months. Store RO Water Properly (Minimize CO₂ Absorption) Since RO water absorbs CO₂ from air, you can lower its pH by storing it in an airtight glass or stainless steel container, but not plastic, please. Avoid leaving water exposed to air for hours. And store the container in the refrigerator, as cold water holds less CO₂. This helps in increasing the water’s pH but doesn’t fully neutralize it. Adjust Source Water Conditions This option has limited impact, but if your source water is extremely soft or low-alkalinity (e.g., some well water or rainwater), the RO output will be even more acidic. Pre-treating source water with a calcite filter before RO can help, but this is rarely necessary for municipal water. For most Canadians, this is not needed. Frequently Asked Questions Is RO water more acidic than bottled water? No, RO water is not more acidic than bottled water. Many bottled waters test at pH 5.5 to 6.5 such as Aquafina and Dasani. Some spring waters are pH 7 to 8. RO water has a pH from 5 to 6.5, just like that of many bottled water. Should I worry if my RO water has a pH below 7? No, there is nothing to worry about if your RO water has a pH below 7, ranging from pH 6.0 to 6.5. It is normal for RO water. If your pH drops below 5.0, test your source water and check your membrane. Otherwise, there is no health concern. How quickly does RO water become acidic after filtration? RO water immediately becomes acidic after filtration. The instant treated water passes through the membrane, it gets in touch with air. That’s when CO₂ dissolves and pH drops. This happens within minutes. Can I mix RO water with tap water to balance pH? Yes. If you mix RO water with tap water (which contains alkaline minerals), the pH of the water mixture rises. A 1:1 ratio of RO to tap water blend typically results in a neutral pH 7. However, this also reintroduces tap water contaminants. Adding a remineralization filter to the RO setup is a better solution to balance the RO water’s pH. Can RO water erode teeth? Drinking RO water does not immediately erode or negatively affect your teeth like acidic drinks do, but RO water does have the potential to harm your teeth. RO water doesn’t contain the alkaline minerals that buffer the water’s pH. Over time, consuming RO water regularly starts to demineralize your enamel and eventually erode it. The Verdict: Don’t Sweat the pH of RO Water RO water is acidic because the reverse osmosis process removes minerals from the water that act as buffers to stabilize the pH. Secondly, the instant CO₂ dissolves in water, it forms carbonic acid, which further drops the water’s pH. Slightly acidic RO water lies from pH 5 to 6.5, which is completely normal and safe. And since your body maintains its pH, you need not worry about the low pH RO water harming your health at all. For most Canadian homes, the slightly acidic RO water is not a problem. RO water is clear of harmful contaminants such as microplastics, arsenic, PFAS, and heavy metals and is good for your well-being. But if you still prefer the taste of slightly alkaline water, add a remineralization filter to your RO system to raise the water’s PH. Unsure of which RO system to get for your home? Take illi water’s quick system quiz right away to make the right call.
Learn moreDoes RO Remove Lead from the Water?
Lead is one of the most difficult water impurities to guess, as it is tasteless, ordorless and has no visual signs of its presence. Lead contamination is also the most persistent water quality concern for homeowners across Canada, and reverse osmosis (RO) is consistently recommended as one of the most reliable solutions. But the question is: does RO remove Lead from the water or not? Reverse osmosis is a filtration process that forces water through a semi-permeable membrane, trapping contaminants, including heavy metals like lead, while letting clean water pass through. It's widely regarded by water treatment professionals and regulatory bodies as one of the most effective methods for removing lead from drinking water. In this article, we'll break down exactly how RO systems remove lead, what makes them more effective than standard filters, and what to look for when choosing a system for your home. Key Takeaways RO removes up to 99% of lead via a semi-permeable membrane (0.0001 microns) Lead enters water mainly through old pipes, solder, and fixtures, not treatment plants No safe lead level exists; children and pregnant women face the highest risk RO outperforms carbon filters, softeners, and sediment filters for lead removal Choose NSF/ANSI 53/58-certified systems and maintain filters/membrane regularly for reliable protection Does Reverse Osmosis Remove Lead? Quick Answer Yes, reverse osmosis is highly effective at removing lead from drinking water. The Water Quality Association’s (WQA) fact sheet on lead also proves this. A properly maintained RO system can remove up to 99% of lead present in tap water, making it one of the most reliable filtration methods available to homeowners. This is because the RO membrane's pores are small enough to block lead ions and particles, while still allowing water molecules to pass through. That said, effectiveness depends on factors like membrane quality, water pressure, and regular maintenance, all of which we'll cover in detail below. Why Lead in Water Is Harmful to Your Health? Lead is a toxic heavy metal, and unlike some contaminants, there's no known safe level of exposure. Even small, repeated doses can accumulate in the body over time, affecting multiple organ systems. Effects on children Children are especially vulnerable to lead exposure because their bodies absorb it more readily than adults, and their nervous systems are still developing. Even low-level exposure has been linked to: Delayed cognitive development and lower IQ Behavioral and attention difficulties Slowed growth Hearing problems Because these effects are often irreversible, health authorities emphasize prevention rather than treatment when it comes to childhood lead exposure. Effects on adults In adults, long-term lead exposure is associated with: High blood pressure and cardiovascular issues Kidney damage Reproductive health problems Memory and concentration difficulties Pregnant women face additional risk, as lead stored in the bones can get into the bloodstream, cross the placenta, and affect fetal development. What lead levels in water are considered risky? Health Canada recommends a maximum acceptable concentration of 5 micrograms per liter (µg/L) for lead in drinking water, a threshold lowered in recent years as research confirmed that even low exposure carries health risks. The U.S. EPA, by comparison, uses an action level of 15 parts per billion (ppb) at the tap, though it considers any detectable lead a concern, given there's no established "safe" threshold. Because risk increases with cumulative exposure over time, even water that tests below regulatory limits can pose a concern for households with young children or pregnant women, which is why many health authorities recommend filtration as a precaution rather than waiting for a problem to be confirmed. How Lead Gets Into Your Drinking Water? Lead contamination almost always happens after water leaves the treatment plant, not before. Municipal water suppliers test and treat water to meet safety standards, but once it travels through distribution pipes and into a building's plumbing, it can pick up lead along the way. The most common sources include: Lead service lines: Pipes connecting homes to the main water line, common in homes built before the 1980s Lead solder: Used to join copper pipes in older plumbing systems Brass fixtures and fittings: Faucets, valves, and fittings that contain trace amounts of lead, even in some "lead-free" labeled products Corrosive water conditions: Water with low pH or high acidity can accelerate the breakdown of lead in pipes and fixtures, increasing the amount that leaches into your tap water The longer water sits in these pipes, overnight, for example, the more time lead has to leach into it, which is why first-draw water in the morning often has higher lead levels than water that's been running for a while. How Does Reverse Osmosis Remove Lead? Lead removal through RO relies on a principle called size exclusion combined with pressure-driven separation. Water is pushed through the membrane at pressure, while dissolved lead ions and other contaminants are too large to pass through the membrane's microscopic pores. Instead, they're carried away as wastewater, often referred to as "reject water" or "concentrate," which is flushed out of the system. This process doesn't rely on chemical reactions; it's purely a physical separation based on particle size, which is part of why RO is so consistently effective across different water conditions. A typical system involves multiple stages working together, with the membrane doing the heavy lifting and the surrounding filters protecting it and refining the final result. Here's how each part contributes to lead removal. The Role of the RO Membrane in Lead Removal The membrane is the core of the system, and it's responsible for the majority of lead removal. RO membranes have pores roughly 0.0001 microns in size, small enough to block dissolved lead ions, which are far larger than water molecules. As water is pushed through the membrane under pressure, lead and other contaminants are physically unable to pass through, while purified water continues to the next stage. This is why a properly functioning RO membrane can remove up to 99% of lead from drinking water. Pre-Filtration: Protecting the RO Membrane Before water reaches the RO membrane, it passes through one or more pre-filters, typically a sediment filter followed by a carbon filter. The sediment filter removes larger particles like sand, rust, and dirt, while the carbon filter reduces chlorine and other chemicals that could degrade the membrane over time. Pre-filtration doesn't remove lead directly, but it's essential for protecting the membrane from damage and fouling, which keeps lead-removal performance consistent over the system's lifespan. Post-Filtration: Ensuring Water Purity After water passes through the RO membrane, it typically runs through a final post-filter, usually activated carbon, before reaching the tap. This stage improves taste and odor and helps capture any trace contaminants the membrane may have missed. While the RO membrane handles the bulk of lead removal, post-filtration adds an extra layer of assurance that the water reaching your glass is as clean as possible. Factors That Affect Lead Removal Efficiency While RO is highly effective, several factors influence how well a system performs in practice: Water pressure: RO systems need adequate incoming water pressure (typically 40-60 psi) to push water through the membrane efficiently. Low pressure can reduce both output and filtration effectiveness. Flow rate: Faster flow rates can reduce contact time between water and the membrane, potentially lowering rejection rates for some contaminants. Water temperature: Membranes are typically rated for a specific temperature range; water that's too cold can reduce flow and efficiency, while water that's too hot can damage the membrane. Membrane quality and age: Higher-quality membranes with proper certifications tend to maintain consistent rejection rates, while older or lower-grade membranes degrade faster and lose effectiveness over time. RO System Maintenance and Its Impact on Lead Removal Even the best RO system will lose effectiveness without regular maintenance. Pre-filters typically need replacement every 6-12 months, and the RO membrane itself usually lasts 2-3 years, depending on water quality and usage. Neglecting filter changes allows sediment and chemicals to build up, which can foul the membrane and reduce its ability to block lead and other contaminants. In the worst cases, a damaged or expired membrane may allow lead to pass through largely unfiltered, undermining the entire point of the system. Routine maintenance isn't optional; it's what keeps an RO system performing at the level it's rated for. RO vs Other Lead Removal Methods Not all water filters perform equally when it comes to lead removal. While many homeowners reach for a pitcher filter or faucet-mounted carbon filter as a first line of defense, these options don't offer the same level of protection as a dedicated RO system. Here is a quick snapshot comparing the four main technologies often used for lead removal. Filtration Method Lead Removal Effectiveness Best For Limitations Reverse Osmosis (NSF 58 Certified) Up to 99% removal Homes with lead concerns, older plumbing, families with children Higher upfront cost; produces wastewater Carbon Block Filters (NSF 53 Certified) Certified to reduce lead to 5 ppb or less Budget-friendly lead reduction; improves taste and chlorine removal Effectiveness depends on NSF 53 certification; standard carbon filters may not remove lead Pitcher Filters (with NSF 53) Certified lead reduction when specifically tested Renters, small households, immediate point-of-use Lower capacity; slower filtration; requires frequent cartridge changes Distillation Up to 99.5% removal of impurities Highest purity needs; removing dissolved solids and metals High energy consumption; slow production; removes beneficial minerals Activated carbon filters Standard carbon filters, the kind found in most pitcher filters and basic faucet attachments, work by adsorbing contaminants onto the surface of activated carbon. While they're effective at improving taste and reducing chlorine, their ability to remove lead is inconsistent. Only carbon filters specifically certified for lead reduction (NSF/ANSI Standard 53) reliably remove meaningful amounts of lead. Pitcher Filters Pour-through pitcher filters operate by gravity, allowing water to drip through a carbon block or ion exchange filter. Pitchers carrying NSF/ANSI 53 certification are tested for lead reduction and can be an effective, low-cost option for renters or small households. However, they have lower capacity, slower filtration rates, and require frequent cartridge changes compared to under-sink systems. Distillation Distillation is one of the oldest water treatment methods. When executed properly, it can remove up to 99.5% of impurities from water, including heavy metals like lead. The process works by heating water to create steam; inorganic compounds do not evaporate and are left behind in the boiling chamber. However, operation costs for distillation can be among the highest for home treatment systems. Also, it is a very slow process and produces water in batches over several hours. Reverse osmosis systems RO systems consistently outperform these alternatives because of the membrane's ability to block dissolved contaminants at a molecular level, rather than just adsorbing or filtering out larger particles. When certified to NSF/ANSI Standard 58, RO systems are tested and verified to remove up to 99% of lead from drinking water, a far higher and more consistent rate than most carbon-only solutions. The benefits of RO systems are far more than any other water filtration system, but the only trade-off is that RO systems are typically more expensive upfront. They also produce some wastewater during filtration, while carbon filters are cheaper and simpler to install. But for households specifically concerned about lead, particularly those with older plumbing, young children, or pregnant women, RO remains the more dependable choice precisely because it doesn't depend on the contaminant being a good candidate for adsorption. How to Choose a Reverse Osmosis System for Lead Removal? Not all RO systems are built the same, and choosing the right one makes a real difference in how reliably it removes lead over time. Here's what to look for: Look for NSF/ANSI certification The most important factor is certification. Look specifically for NSF/ANSI Standard 58, which verifies that a system has been independently tested and proven to reduce lead and other contaminants to safe levels. Some systems are also certified to NSF/ANSI Standard 53, which covers health-related contaminants more broadly. If a system doesn't list third-party certification for lead reduction, it's worth confirming with the manufacturer directly or choosing a different model. Check the number of filtration stages Most quality RO systems include at least 4-5 stages: sediment pre-filtration, carbon pre-filtration, the RO membrane, a post-filter, and sometimes a remineralization stage. More stages generally mean better protection for the membrane and improved water taste, though the membrane itself does the actual lead removal. Avoid systems that skip pre-filtration entirely, as this can shorten membrane life and reduce long-term effectiveness. Consider build quality and materials Look for systems with food-grade, BPA-free components and corrosion-resistant housings. Higher-quality builds maintain more consistent pressure and performance over time, which directly affects how well the membrane rejects lead. Cheaper systems with lower-grade materials tend to degrade faster, leading to inconsistent filtration. Factor in maintenance requirements Every RO system requires periodic filter changes and membrane replacement, but schedules vary by brand and model. Look for systems with readily available replacement filters and clear manufacturer guidance on replacement intervals. Filter-change indicators or simple cartridge designs make it easier to stay on top of maintenance, which is directly tied to maintaining lead-removal performance. Match the system to your household needs Consider household size and water usage when choosing a system. Under-sink RO systems with a storage tank suit most households and provide a steady supply of filtered water on demand, while tankless or higher-capacity systems may suit larger households or higher daily usage. If your home has notably high lead levels, consider systems with additional pre-filtration stages or consult a water treatment professional before buying. The right RO system is one that's certified for lead reduction, properly maintained, and sized for your household; all three matter for getting the performance you're paying for. Frequently Asked Questions Do I need additional filters with RO for lead removal? No. Properly certified RO systems carrying NSF/ANSI 53 or 58 certification are verified for lead reduction and suffice to eliminate lead from water. Can installing RO cause lead to leach from pipes? No, RO installation itself doesn't cause leaching, but it makes the water “hungry” for minerals because RO-treated water is naturally lower in mineral content, which can slightly increase leaching from old pipes downstream if not properly managed or remineralized. Does an RO system waste a lot of water? A typical reverse osmosis system sends 4 to 9 gallons of water down the drain for every gallon of treated water it produces. However, WaterSense-certified systems are much more efficient, using just 2.3 gallons or less per gallon of treated water. How can I tell if I have lead pipes? Start by finding the service line where it enters your home, usually close to the main shut-off valve in your garage, basement, or crawl space. Gently scratch the pipe with a coin or key. If the line reveals shiny silver color and a magnet does not stick, it's likely lead. Does RO remove healthy minerals along with lead?Yes, RO removes beneficial minerals like calcium and magnesium along with contaminants. Many systems include a remineralization stage afterward to add these minerals back, improving taste without compromising the system's lead-removal effectiveness. Final Thoughts Lead contamination has become a real concern for many Canadian households, especially those with older plumbing or aging municipal infrastructure. The good news is that reverse osmosis offers one of the most reliable, well-tested solutions available, capable of removing up to 99% of lead when properly certified and maintained. From the membrane's molecular-level filtration to the supporting pre-pre and post-filter stages, every part of a quality RO system plays a role in keeping your drinking water safe. If you haven't tested your water yet, that's the logical first step, followed by choosing a certified system built for your household's needs. Ready to protect your family's drinking water? Check out illi water’s range of certified reverse osmosis systems and find the right fit for your home today.
Learn moreDoes Reverse Osmosis Remove Fluoride?
If you grew up in Canada, you know that fluoride in drinking water isn’t something new. It’s been added to water for more than 75 years as a part of municipal water treatment to prevent tooth decay. But the debate around it is becoming stronger with time. Cities like Calgary and Montreal don’t fluoridate their water. New studies are raising questions about the safe fluoride exposure levels. And homeowners are now wondering: does reverse osmosis remove fluoride, and do I even need to get rid of it? Reverse osmosis (RO) is undoubtedly one of the most trusted filtration methods available. So it is natural for homeowners to think of it when they ask, ‘do water filters remove fluoride’? Yes, RO does remove fluoride from drinking water. But the answer is more nuanced than it is for other contaminants, such as microplastics and per- and polyfluoroalkyl substances (PFAS), because fluoride is not a physical particle but a dissolved ion. So in this guide, we’ll be looking at the real question: does a reverse osmosis system remove fluoride, does it do it comprehensively, and is that something you actually need to worry about? Key Takeaways RO removes 85–95% of fluoride, with premium systems at 97–99%. Carbon and ceramic filters remove none. Most Canadians don't need to get rid of fluoride from their drinking water. Municipal water contains approximately 0.7 mg/L of fluoride, which meets Health Canada’s optimal fluoride level. At 0.7 mg/L, fluoride in water is safe and beneficial for teeth and bones. RO systems with old membranes, clogged filters, or low pressure are less efficient at removing fluoride. Activated alumina also removes 85% to 95% of fluoride, but since RO tackles more contaminants and activated alumina only targets fluoride, RO systems are the better water treatment option for homeowners. Before deciding to eliminate fluoride from drinking water, get your water tested first. Does RO Remove Fluoride? Quick Answer Yes, reverse osmosis removes fluoride from drinking water. Most RO systems achieve fluoride removal of around 85% to 95%. Premium systems with fresh membranes can take that removal to even 97% to 99%. That said, not every RO system performs equally. Efficiency of an RO system depends largely on its membrane quality, water pressure, and system maintenance. Ceramic filters and standard carbon filters, be it pitchers or faucet-mount units, aren’t effective at removing fluoride. Specialized ion-exchange resins and activated alumina can reduce fluoride, but not as reliably as reverse osmosis. What Is Fluoride and Why Is It In Our Water? Fluoride is a naturally occurring mineral found in groundwater and has been part of Canadian municipal water treatment since the 1940s to improve dental health. Fluorine, the 13th most abundant element in Earth's crust, occurs naturally in soil, water, and rocks. Fluoride is in its ionic form. In Canada, fluoride enters drinking water both naturally and artificially. Regions like British Columbia's volcanic areas and the Canadian Shield have groundwater exceeding Health Canada's maximum acceptable concentration of 1.5 mg/L, though the optimal fluoridation level is 0.7 mg/L. Fluoride reaches Canadian water through natural infiltration, artificial fluoridation, and other sources. Natural infiltration refers to the seepage of fluoride from rock erosion, with high levels in southwestern Ontario, Saskatchewan aquifers, and Alberta prairies. Artificial fluoridation refers to purposefully introducing fluoride into water. Brantford was the first city to fluoridate water in 1945. Fluoridated cities include Ottawa, Toronto, and Winnipeg; Calgary, Montreal, and Vancouver do not fluoridate. Other sources of fluoride include processed foods such as canned soups and cereals, black tea (0.3–0.5 mg/L), and some bottled waters. Now that you understand what fluoride is and where it comes from, let's talk about whether you actually need to remove it. Potential Benefits of Fluoride Fluoride strengthens your bones and teeth. Your body uses it to build as well as maintain hard tissues. Health Canada, the Canadian Medical Association, and the Canadian Dental Association endorse fluoridated water. At optimal levels in drinking water, fluoride protects your teeth and bones in the following ways: Aids in repairing the early stages of tooth decay, reversing minor tooth damage before it turns into a cavity. A Canadian review by the National Collaborating Centre for Environmental Health (NCCEH) proves this. Fortifies your tooth enamel, making it more resistant to bacterial attacks. And also destroys the ability of bacteria that produce acid. That helps reduce cavities by up to 25% in both kids and adults. Helps build your bones and continues to strengthen them. Fluoride deficiency can cause bone weakness and also contribute to serious conditions such as osteoporosis. At optimal levels (0.7 mg/L), fluoride is considered safe and beneficial for public health and doesn’t impose any health risks. Health Canada strongly maintains its stance that fluoridation at these levels has more benefits than concerns. Common Concerns About Fluoride Exposure Fluoride exposure is alarming when its levels rise above 1.5 mg/L. That’s when it can cause dental fluorosis (white spots on teeth) in children up to 8 years of age. Extensive fluoride exposure, above levels of 8 mg/L can also result in skeletal fluorosis, a condition that weakens your bones over time. But the odds of it happening are after decades of overexposure. Plus, the condition is quite rare in Canada. A Jama Pediatrics study in 2019 explored the link between fluoride exposure and IQ in children. The results showed that a 1 mg/L increase in urinary fluoride caused a 4.49-point lower IQ score among kids between the ages of 3 and 4. Another National Institutes of Health (NIH) analysis published in 2024 evaluated multiple studies on the relationship between children’s IQ and fluoride exposure. The review found that higher fluoride consumption is indeed associated with lower IQ levels, especially in studies that checked fluoride in urine instead of water and those that used standardized IQ tests. While these studies do prove that consistent high fluoride intake comes with health concerns, that only happens over a span of decades and at levels above 1.5 mg/L. Well water users, heavy tea drinkers, and kids on formula milk made with fluoridated water are at risk. Other than that, fluoridated water doesn’t cause you any harm. How Does an RO System Remove Fluoride? A reverse osmosis system eliminates fluoride by using electric charge and the RO membrane’s microscopic pores. The tiny pores of the membrane are small enough to physically block wide-ranging contaminants. But fluoride is a dissolved ion, not a particle, which is why RO has to rely on electrostatic repulsion to force fluoride away from the membrane’s surface. Let’s discuss the science behind it in a step-by-step manner to better understand how an RO system kicks out fluoride. RO Pushes Water Against the RO Membrane The RO system uses your home’s water pressure (usually 40 to 60 PSI) or an additional pump to push water against a semi-permeable RO membrane. This extra pressure reverses the water’s natural osmotic flow. Typically, an RO membrane has pores of 0.0001 microns in size. Some RO membranes have an even smaller pore size. So the membrane blocks out all the physical particles. But since fluoride is an ion that gets dissolved in water and has a size of roughly 0.00004 microns, the RO membrane is incapable of filtering it. Uses Electrostatic Repulsion to Block Fluoride Besides being microscopic in size, the RO membrane also carries an electrical charge on the surface. Fluoride is a negatively charged ion (F⁻), and the membrane’s surface also has a negative charge. Like charges repel each other, so the RO membrane pushes the fluoride ions away from the membrane right into the wastewater stream. And that’s precisely how you get fluoride-free water using an RO system. How Well RO Works, and What Affects Its Efficiency? To date, reverse osmosis remains one of the most effective and reliable fluoride removal solutions. High-quality systems with a brand new, certified RO membrane can remove up to 97% to 99% of fluoride successfully from drinking water. Standard RO systems that undergo regular maintenance can eliminate around 85% to 95% fluoride from water, which is still a good efficiency measure. That said, not all RO systems deliver such results. Let’s take a look at the factors that affect the efficiency of an RO system in eliminating fluoride. RO Membrane Quality Thin-film composite (TFC) RO membranes perform better at filtering fluoride than cellulose triacetate (CTA) membranes. Premium systems such as the Pentair reverse osmosis system by illi water can achieve over 90% fluoride rejection. Generic membranes, on the contrary, may only achieve 70% removal. When investing in an RO unit, particularly for fluoride elimination, look for NSF/ANSI 58 certification to ensure the system has been verified for fluoride removal. Water Pressure RO systems demand a water pressure of 40 to 60 PSI (pounds per square inch) for comprehensive fluoride removal. Low water pressure, a common issue in older homes or those using well water, lets fluoride slip through the membrane. If your water pressure is lower than 40 PSI, get a booster pump for your system to fix the issue. Membrane Age and Condition New membranes can reject around 95% of fluoride. When it is 2 to 3 years old, it is likely to remove only 70% of fluoride. The membrane’s efficiency decreases as the membrane grows older. Membrane fouling and scale buildup also change its electrostatic balance and hence the capacity to reject fluoride. Replace your system’s RO membrane every 2 to 3 years for optimal fluoride elimination. System Maintenance and Filter Changes Clogged pre-filters (carbon and sediment filters) expose the membrane to chlorine damage. Chlorine is present in municipally treated water, and if the pre-filters fail to remove it, it can directly damage the RO membrane. A damaged membrane is prone to cracks, and, with time, it allows fluoride to pass through. Follow your system’s manufacturer's replacement schedule for all pre- and post-filters to maintain high fluoride rejection rates. Certification to Look For When shopping for an RO system specifically to remove fluoride, look for independent third-party certification to NSF/ANSI Standard 58. This standard includes specific test protocols for fluoride reduction performance, ensuring the system can effectively reduce the contaminant to the levels prescribed. It also covers the system's structural integrity, safety of materials, and TDS reduction. RO vs Other Fluoride Removal Methods Besides RO, there are other methods to remove fluoride too. The table below gives a quick snapshot of the fluoride removal efficiency of different filtration systems. System Type Fluoride Removal Efficiency Notes Other Contaminants It Removes High-quality RO (new membrane) 97–99% Certified to NSF/ANSI 58 standard Removes 100+ contaminants, including PFAS, total dissolved solids, nitrates, chlorine, chloramines, tastes, odors, heavy metals, bacteria, parasites Standard RO (well-maintained) 85–95% Typical performance for most systems Removes 100+ contaminants, including PFAS, total dissolved solids, nitrates, chlorine, chloramines, tastes, odors, heavy metals, bacteria, parasites Carbon filter (Brita, etc.) 0% Does not remove fluoride Sediment, organic compounds, and unpleasant tastes and odors Ceramic filter 0% Does not remove fluoride Dirt, bacteria, sediment, and protozoan cysts such as Cryptosporidium and Giardia Activated alumina 85–95% Effective but does not remove other contaminants Only fluoride Ion Exchange (Strong-Base Anion Resin) 80–95% (depending on resin type and water chemistry) Effective but requires specific resin type. Can be used as a point-of-use or whole-home system Arsenic, nitrates, and some other anions. Less comprehensive than RO Of the different home water filtration solutions available, activated alumina, ion exchange resins and reverse osmosis do a decent job at removing fluoride. Since we’ve talked about RO before, let’s throw some light on the other two. Activated alumina is a porous material that eliminates fluoride through adsorption. While its exact efficiency for fluoride removal varies according to water conditions and system design, it is reported to eliminate around 85% to 95% of fluoride. Ion exchange resins remove fluoride by swapping fluoride ions with chloride or hydroxide through a process known as anion exchange. Specialized strong-base anion exchange resins can remove around 80% to 95% fluoride, depending on water chemistry and resin type. But they have a shortcoming too. They are sensitive to competing anions like nitrate and sulfate, which obstructs their efficiency in removing fluoride ions. While they can be effective for targeted treatment, reverse osmosis provides more comprehensive protection by removing fluoride alongside hundreds of other contaminants. Since activated alumina only addresses fluoride and no other contaminant, and ion exchange resins can lose their effectiveness, water treatment experts prefer reverse osmosis over the other two, as the latter tackles a lot more than just fluoride. Not to forget, they are cost-effective over time, easy to use and maintain, and provide comprehensive filtration. For Canadian homeowners, RO is the clear winner indeed. Why Do Some Sources Claim RO Doesn't Remove Fluoride? You may have come across some sources claiming reverse osmosis and fluoride don’t go hand in hand. Well, that’s not true because RO does quite a brilliant job at stripping water clear of fluoride. However, the false rumors around RO and fluoride elimination are rooted in the following: Confusing RO with Standard Water Filters Carbon and ceramic pitchers and faucet-mount filters like those by Brita and Pur do NOT remove fluoride. People buy a $30 pitcher and assume it works like reverse osmosis and then complain how filters don’t remove fluoride. Carbon works by trapping particles on the surface, also known as adsorption. It captures particles big enough to stick, such as sediment, organic compounds, and unpleasant tastes and odors. Ceramic filters eliminate impurities by catching particles larger than their microscopic pores, typically ranging between 0.2 and 1.0 micron in size. They remove dirt, bacteria, sediment and protozoan cysts such as Cryptosporidium and Giardia. Both carbon and ceramic filters remove particles, and since fluoride is a dissolved ion, it escapes these two, as they are not simply designed to tackle dissolved ions. Misunderstanding How Fluoride Exists in Water Many homeowners have the misunderstanding that fluoride exists as a floating flake in water. It does not. Fluoride dissolves into water as individual ions, and you cannot trap ions with a net like a carbon filter. You need a microscopic membrane that can separate ions from the water molecules. RO membranes can do that. Misconception About What Removal Means Some people believe reverse osmosis doesn’t eliminate fluoride because it doesn’t take it down to zero. Yes, technically that is correct, but it is also misleading. ‘Removal’ in the drinking water landscape isn’t synonymous with zero. It basically means decreasing the levels of a specific contaminant to a more practical and safe limit. Considering Health Canada’s MAC for fluoride at 1.5 mg/L, if an RO system can reduce it to 0.15 mg/L, that is equal to a 90% reduction. By any practical definition, that is actually removal. So when you hear someone say ‘RO doesn't filter fluoride,’ what they really mean is ‘reverse osmosis does not remove 100% of fluoride.’ In reality, that is true of almost all the filtration options for all the contaminants. The real question isn’t whether RO removes everything; it is whether it brings fluoride down to a safe and acceptable level. The answer: yes, it does, and that is removal. Outdated Information About Membrane Performance Older literature from the 1980s, such as a 1983 study published in Environmental International, stated RO can remove 40% to 60% of fluoride. Technology has advanced a great deal since then. Modern TFC membranes easily achieve fluoride removal of 90% to 95%. If you come across an article on the internet claiming water purifiers don’t remove fluoride, check its publishing date. Odds are high, it is more than a decade old and based on outdated technology. How to Decide Whether to Remove Fluoride from Your Water The entire discussion above proves that constant fluoride exposure only at exceedingly high levels is damaging for your health. So the decision to eliminate fluoride from water is completely a personal one. For most Canadians, fluoride removal is not a medical necessity but a preference to have full control over their water quality. Here’s a helpful framework you can use to make a wise decision for your household regarding removing fluoride from water. First, test your water. If you use municipal water, check your city’s annual water quality report. If you are on well water, schedule a certified lab test. You can easily find your municipality’s water quality report online, as most cities publish them on the internet. Search for your city name and type ‘drinking water report’ or ‘water quality report’, and you’re likely to come across it in the results. You can also check out your city’s official website and search for the report in the ‘environmental services’ or ‘water services’ sections. Want a paper copy? Visit or call your local municipal office, and request one. Once you have the water quality report or lab test results, check the fluoride levels. Levels are below 0.5 to 0.7 mg/L, fluoride removal is completely optional. Fluoride isn’t harming you at all, but if you’re health-conscious and prefer fluoride-free water, remove it. Levels go beyond 1.5 mg/L? Fluoride removal is the right move forward, particularly if you have infants at home who are formula-fed, or if any family member has excessive tea intake, or if you prefer zero fluoride. When it comes to stripping fluoride from your water, no system does a job as excellent as an RO system. Frequently Asked Questions Does tankless RO remove fluoride as effectively as tank systems? Yes, both tankless and tank RO systems remove fluoride equally effectively. Fluoride removal depends on the RO membrane, not the tank’s inclusion or its design. Both system types use the same kind of RO membranes and achieve the same fluoride removal. How much does a fluoride-removing RO system cost? A dedicated fluoride-removing RO system typically costs between $300 and $1,500 for the unit plus professional installation. Annual maintenance for replacement filters and membranes adds another $100 to $300 per year. Should I get a whole-house or under-sink RO system for fluoride? To remove fluoride, an under-sink RO system is the most practical and cost-effective choice. Whole-house RO systems are more expensive and better suited for treating other contaminants, while under-sink units efficiently target drinking and cooking water where fluoride exposure matters most. How much water does an RO system waste? Traditional RO systems waste 3 to 4 gallons of water for every gallon of water they purify. High-efficiency systems reduce the wastage as they have a waste-to-pure water ratio of 1:1. Does RO remove healthy minerals along with fluoride? Yes, RO removes 90–99% of all dissolved minerals, including beneficial calcium and magnesium. This is why many premium RO systems include a remineralization filter that adds back healthy minerals, improving both taste and pH balance while keeping fluoride out. So, What's the Verdict on RO and Fluoride? The verdict is a no-brainer. Reverse osmosis does remove fluoride. By eliminating 85% to 95% of fluoride along with 99% of other contaminants, it is one of the most trusted home filtration solutions so far. But what’s even more important to note is that not everyone needs fluoride-free water. Whenever you plan on getting a water treatment option to address certain contaminants, start with a water test first. Decide on the right treatment solution based on the results, your household needs, and preferences. And if you are sure you don’t want fluoride in your water, you can rely on illi water’s brilliant range of cutting-edge reverse osmosis systems designed keeping in mind Canadian water challenges.
Learn moreHow to Install Reverse Osmosis System: Step-by-Step DIY Guide (2026)
RO system installation may sound complicated, but an average homeowner can complete this project with no prior experience. Installing a reverse osmosis system takes 2–4 hours with basic tools. The core steps include shutting off water, installing a feed water adapter, mounting the RO faucet, installing the drain saddle, mounting the RO assembly, connecting the tank (or power for tankless), running tubing, pressure testing, and flushing before first use. The process is fairly straightforward, especially when you break it into manageable steps. We'll guide you through all the steps for both tankless and tank-style RO systems. Read on to learn what’s required, mistakes to avoid, and when to call for professional help. Before You Start: Prep Checklist Before you install a reverse osmosis system, take some time to prepare the location and confirm its suitability. With this precaution, you can prevent leaks, delays, and expensive damage or rework in the future. Follow this pre-installation checklist for a seamless setup. Measure the space under your sink. A tank-style system needs room for the storage tank and the filter manifold, with some room left over for maintenance access. Tankless systems need the space of a shoebox, but there should be proper clearance for filter replacements. Check for existing faucet holes or plan to drill one. Your sink may already have an unused faucet hole; if not, drill one for the RO faucet. Verify that the cold water shutoff valve is accessible. This valve should work properly and be easy to maneuver after RO installation. It supplies water to the RO systems, so you need to completely close in before installation. Check the water pressure. Most reverse osmosis systems need 40-100 psi to perform correctly. If your water pressure falls below this range, an electric booster pump or permeate pump is required. Check local plumbing codes for air-gap faucet requirements for your municipality. For tankless systems, ensure that a Ground Fault Circuit Interrupter (GFCI) is within 3-4 feet of the unit. This is necessary for preventing water electrocution since it immediately cuts power if there’s a dangerous ground fault or leakage due to water exposure. A GFCI outlet is a life-saving electrical device that cuts power within 1/40th of a second if it detects electricity leaking toward water or a person. When unboxing the system, compare each component to the included checklist and confirm that everything is included in the package. Tools & Materials You'll Need RO system installation usually doesn’t require specialized plumbing equipment. Before starting this installation, make sure you have the following items: Adjustable wrench Phillips screwdriver Flathead screwdriver Power drill with drill bits 7/16" drill bit for faucet hole 1/4" drill bit for drain saddle Teflon tape Utility knife for trimming the tubing Measuring tape Bucket (to catch the residual water) Towels Safety glasses If you’re drilling a hole in granite or quartz countertops, a diamond-tipped bit is usually necessary. For more filtration upgrades, check out illi water’s whole-home water treatment systems or under-sink filtration solutions paired with RO systems for overall better water quality in your home. Part 1: How to Install a Tank-Style RO System (10 Steps) Tank-style RO systems are currently the most popular option for residences. They are dependable, affordable, and don’t need electricity to run. Instead, the model has membranes that filter the water pushed through them and a pressurized tank to store the results. Even without experience, most homeowners can install a reverse osmosis system in around 2-4 hours. The steps below will take you through the process: Step 1 : Shut Off the Cold Water and Drain the Line The first step is finding the cold water shutoff valve beneath your sink and turning it off (this usually requires giving it a clockwise turn). Then, open the faucet to release pressure in the water line. Be sure to put a towel and bucket under the shutoff valve. This precaution will catch any residual water in the pipe when the supply line is disconnected in the next step. If you skip this step, the residual water might soak your cabinet’s interior. Before moving to the next step, let all the water fully drain out of the line. Step 2: Install the Feed Water Adapter Once the water has drained, use an adjustable wrench to disconnect the cold water supply line from the shutoff valve. Then, install the feedwater adapter (included in the system package) between the supply line and valve. The adapter will supply untreated cold water to the RO system. Wrap the threaded connections with Teflon tape where needed, then securely reconnect the supply line. Tighten the connection. Keep your force firm but controlled. Too much force would crack the plastic threads or damage the washers. Step 3: Mount the RO Faucet (Drill If Needed) Your sink may already have an unused hole available, usually for installing soap dispensers or sprayers. If not, you'll have to drill a 7/16" hole in a flat space on the countertop or sink deck. If your sink is stainless steel, a standard metal bit in the drill will probably be fine. For materials like natural stone, quartz, or granite, a diamond drill bit and slow speeds are necessary. Cracks in such countertops can be very expensive to repair/replace, so you might want to get a professional in for this part. After the drilling, install the faucet with the included mounting hardware. Ensure that the faucet is sitting securely with no jiggling or wobbling. Step 4: Install the Drain Saddle The drain saddle connects the RO system’s drain line to the sink’s drain pipe. To install the saddle, you will position it on the vertical drain pipe above the P-trap and also above any dishwasher or garbage disposal connection. Then, drill a 1/4" hole on one side of the drain pipe and align the saddle opening with this hole. Tighten the saddle’s clamps and make sure they’re even and secure. This step is important, especially the placement of the drain saddle. Incorrect placement can lead to backflow problems and unpleasant odors. Step 5: Mount the RO Manifold Select a location on your cabinet wall for the filter manifold to hang vertically. Make sure there’s enough room under this space for filter changes and regular replacements. There should be at least 3 inches of clearance below the cartridges. Once you’ve selected the location, mark the screw positions and drive in the mounting screws. Hang the manifold and see that it’s secure. Many homeowners find the best place to be near their cabinet’s front sidewall, where the space is easily accessible for maintenance. Step 6: Connect and Verify Storage Tank Pressure Wrap Teflon tape to secure the storage tank nipple threads, then tighten the tank valve in place by hand. Before you connect the tank to the system, check the empty tank pressure using a low-pressure tire gauge. The reading should be around 5-7 psi (pounds per square inch) for an empty tank. This step might be overlooked during reverse osmosis installation, but it’s crucial to maintain correct pressure. If the reading is off, use a bike pump to inflate or deflate the pressure to the right specifications. A low tank pressure means a weak RO water flow, while a too-high pressure leads to damaged pipes and premature system failure. Placement and proper tightening are also important. Remember, overtightening can cause the plastic threads to crack. Step 7: Run the Color-Coded Tubing Most reverse osmosis systems use 4 colors of 1/4" tubing to make installation simpler. The usual colors include: Red or white tubing: feed water supply from the cold line to the manifold Blue or yellow tubing: filtered water to the faucet Green tubing: tank line from manifold to tank Black tubing: drain line from manifold to drain saddle Complete the connections according to the included diagram: don’t try to guess what goes where. The push-fit connections will go in until you feel a second click: pull the tubing gently to make sure it’s secure. Use the utility knife to ensure clean square cuts. If the tubing ends are crushed or angled, slow leaks can occur. Step 8: Pressure Test It’s now time to turn the cold water back on, but very slowly. Open the storage tank valve and check each connection for any leaks, especially in the tank fitting, drain saddle, and feed adapter. A single drip might signal a loose thread or unseated fitting. Immediately correct such problems by researching the tubing of re-tightening the fittings. Step 9: Sanitize and Flush (Three Full Tanks) Your system is installed, but don’t drink from it yet! You still have to flush the system thoroughly and sanitize it. For new models, most manufacturers recommend adding a little food-grade hydrogen peroxide or unscented household bleach (if the instructions allow it) to the pre-filter housing. This step will sanitize the internal components of the RO system as well as the membranes and tubing. After the sanitization, open the RO faucet and fill the tank, then drain. Fill it again and drain. Repeat these steps a few times. This way, you’ll have flushed the system three times with clean water. The flushing step will remove the sanitizing agent, carbon fines, and any manufacturing residues. Only start drinking water from the system after the third full drain. Step 10: Final Leak Check and Done Check the RO system again around 24 hours after the installation. Recheck each connection and fitting: a slow drip won’t be immediately apparent right after installing. One helpful hack here is to put dry paper towels under each fitting and leave them overnight. If they’re still dry the following day, the installation is a success! Part 2 : How to Install a Tankless RO System Tankless RO systems are becoming more popular among homeowners aiming for better water quality. It isn’t surprising, as they save you cabinet space and provide faster water flow. Unlike the tank systems, though, they do utilize electricity to give you filtered water whenever required. A tankless RO water filter system installation is similar to the tank model, but there are several essential differences you should be aware of: The installation process is similar overall, but there are several important differences. Let’s have a look at them now: Key Difference #1: You Need a GFCI Outlet Tankless RO systems use a small internal electric pump to power the filtration system and provide smart monitoring features. To provide the electricity for this purpose, you need a Ground Fault Circuit Interrupter (GFCI) outlet within 3-4 feet of the installation. If there’s no such outlet under your sink, you’ll have to call in an electrician to install one. Installing a GFCI outlet may cost around $150-$350, depending on your location and requirements. This is usually the highest cost incurred for under-sink reverse osmosis system installation for tankless models, so budget accordingly. Key Difference #2: Smaller Footprint, No Tank to Mount Tankless units are space-saving: they’re around the size of a regular shoebox. There’s no storage tank to make room for either, which frees up your under-sink space. This feature is the top reason why homeowners with modern kitchens prefer the tankless RO system option. The systems mount horizontally or vertically according to their manufacturer’s instructions. If you have a certain preference, choose the model accordingly, or get in touch with illi water for better guidance. Key Difference #3: Feed Water and Drain Connections Tankless systems utilize the same setup as traditional tank models, with a drain saddle and feed water adapters. However, tankless RO setups discharge wastewater more quickly, so the drain saddles need to be very firm and secure. If they’re poorly installed, the drain saddles may leak and cause major water damage. They leak more quickly than tank systems, so it’s best to be alert about this aspect of the setup. Key Difference #4: Faucet with Smart Display (Optional) Many tankless systems have smart faucets that display indicators for TDS (total dissolved solids) or filter life. These are optional, but many homeowners find them useful for regular updates and maintenance reminders. The installation for these faucets is almost the same as standard models, with just an additional thin signal wire connecting the faucet and main unit. You can route this wire alongside the water tubing and start getting smart features immediately upon installation. Key Difference #5: Power On and Auto-Flush Once you’ve connected all the tubing and turned the water back on, restore the water pressure and plug in the unit to the GFCI outlet. Most tankless RO models start the self-flush cycle automatically, which takes around 5-20 minutes. Keep an eye out for error codes during the startup process. If any occur, consult the instruction manual to resolve them. After the automatic flush is over, we recommend manually flushing the system a few more times before you start drinking from it. What NOT to Do with a Tankless System A tankless reverse osmosis water filter installation is beginner-friendly, but preparation can help you get it absolutely right the first time around. Here are some common mistakes to avoid when you're installing your system: Don’t unplug the unit if you're going on an extended trip. Unplugging for 1-2 weeks can lead to the internal membrane drying out. If you have to travel for some time, there's usually a vacation flush mode available. Consult our customer service for more guidance about RO system care during travel. Don’t install the system in unheated spaces: tankless systems can freeze up faster than tank-attached models. The electric pump can crack if the temperature plunges too low. Don’t ignore error codes: more tankless systems can self-diagnose. Look up the error code in your instruction manual before contacting the manufacturer’s customer support. Don’t forget the GFCI outlet requirement: it may be an additional investment, but a very necessary one. Remember, a wet environment plus electricity without GFCI will result in a serious safety hazard. Tank vs. Tankless: Installation Comparison Factor Tank-Style RO Tankless RO Install Time 2–4 hours 1.5–3 hours Difficulty Beginner-friendly Beginner-friendly + electrical check Power Needed None GFCI outlet required Space Needed Manifold + tank (~2 ft³) Single unit (~1 ft³) Storage Tank Required None Drill Holes Faucet + drain saddle Faucet + drain saddle Pre-Install Cost $0 (just tools) $0–$350 if outlet needed Advanced Installation Scenarios Certain RO system installations require more advanced planning due to appliance connections, water pressure issues, or layout. Let’s see how the RO systems are installed in such advanced scenarios: Installing in a Basement (Distance Considerations) If you don’t have enough space under the sink, our tank-style RO system can be set up in a basement. The key rule here is to keep the total tubing run from the RO unit to the faucet less than 10-12 feet. This length ensures that the water pressure stays suitable and gives a proper flow. If this tubing length isn’t possible, you may need to add a permeate pump to establish enough pressure. If you do go down this route, remember that your basement must be heated. When the temperature is below freezing, it can cause permanent damage to the tubing, membranes, and pump components. Connecting Your RO System to a Fridge/Ice Maker Homeowners can connect the filtered water from their RO unit to the water dispenser and ice dispenser in their refrigerator. You’ll need a 1/4" push-fit tee for this purpose, with the same rule as the basement installation: the tubing distance should be less than 12 feet for proper pressure and performance. Again, use a booster pump if your connection line from the unit to the fridge is too long. The effort is worth it, since RO-fed refrigerators give you noticeably cleaner drinking water and better-tasting ice! Installing with Low Water Pressure (Permeate / Booster Pumps) Low water pressure in your home? It’s problematic, but setting up an effective RO system is still possible! If the pressure is below 40 psi, a standard RO setup will only waste a lot of water and give a slow output. There are two solutions here: a permeate pump or an electric booster pump. A permeate pump costs around $80-$150, installs inline, and doesn’t require electricity. It improves water efficiency using drain-line pressure. An electric booster pump requires a nearby GFCI outlet and works by active pumping to increase the feed pressure. It costs around $150-$300, depending on the model. Before investing in either pump, however, test your home water pressure using a $15 hose-bib pressure gauge. The result will determine which upgrade you need. Air-Gap vs. Non-Air-Gap Faucets (Check Your Local Code) Some Canadian municipalities require RO setups to use air-gap faucets. These prevent contaminated drain water from washing back into the system in case of a drain clog. With air-gap faucets, you have a tiny visible gap in the faucet body and need an extra drain tube. Since non-air-gap faucets are a simpler and more common option in residential installations, they’re the usual option in illi water systems. Before you choose any RO system, check your local plumbing codes. Some inspectors may fail any installations that don't use air-gap faucets. If this is the case, you may have to get an upgrade. 7 Common RO Installation Mistakes to Avoid Installing a reverse osmosis system is possible for a beginner, but it helps to know what mistakes you should avoid. Read up on the most common blunders below so you know what not to do: 1. Drilling Through Granite Without a Diamond Bit Countertops made of granite, natural stone, or quartz should be drilled using specialized diamond-tipped bits. A standard masonry or metal bit can permanently crack the surface and cause irreversible damage. You’ll incur high expenses when getting these countertops repaired. Even after professional restoration, the damage may remain visible. If you’re not ready to drill into stone, get a professional plumber or countertop specialist to complete this step. 2. Installing the Drain Saddle Below the P-Trap The drain saddle should always be situated above the P-trap on the vertical section of your drainpipe. If you install it below the P-trap, there’s a higher risk of wastewater backflow into the RO system. If this happens, you’re more likely to experience contamination and unpleasant odors. Incorrect drain saddle installation can also compromise drainage efficiency during the filtration process. Before you start, check the saddle position again and ensure that it’s above the garbage disposal or dishwasher connections to control the wastewater flow. 3. Overtightening Plastic Fittings It’s common for beginners to overtighten the plastic fittings or threaded connections while installing a reverse osmosis system. You’re not working with metal plumbing here: the plastic threads can crack under excessive pressure. In fact, many leaks in RO systems come about due to the fittings being tightened too hard. When you tighten the connections, use a firm but gentle hand. The usual rule of thumb is a quarter turn past the hand-tight stage. If the leaking continues, inspect the O-ring or reseat the tubing. 4. Skipping the Flush Cycles Flush cycles are important after you install a reverse osmosis water filter. The new membranes and filters contain preservatives, carbon fines, and manufacturing residues (usually harmless) that should be removed before you drink the filtered water. If you skip the flush cycles, there will likely be a metallic taste in the water, a cloudy appearance, or black carbon particles in the beginning. Go with the manufacturer’s instructions and take the time to drain 2-3 full tanks before using RO water. 5. Not Checking for Leaks 24 Hours Later Even if the system seems leak-free right after installation, slow drips may occur some hours later when the pressure stabilizes. If you leave the cabinet closed for some days, you might discover water damage soon after. To prevent any issues, recheck every tubing connection, adapter, and fitting 24 hours after the reverse osmosis water filter installation is complete. Place a dry paper towel under each connection overnight: they’ll show even the tiniest of drips. Catch the leaks early, and you’ll be able to prevent mold growth, cabinet wood swelling, and expensive maintenance. 6. Forgetting to Open the Tank Valve Tank-style reverse osmosis systems need their storage tank valve open during operation. If you leave the valve closed after installation, it prevents proper water flow to the faucet. The system may then seem broken even if everything was correctly installed. Once you turn the water supply on again, ensure that the tank valve and tubing direction are aligned. A little oversight like this can lead to a lot of frustration and wasted time. 7. Installing a Tankless System Without a GFCI Outlet Tankless reverse osmosis systems function with electric pumps, which is why they need a GFCI outlet nearby. If you skip this part, there will be a major electric safety hazard in your home. Don’t rely on extension cords either: they’re not meant for permanent installations. If your sink cabinet isn’t near any GFCI outlets, call a licensed electrician to install one before starting your RO system setup. It will cost a fair bit, but the initial cost is cheaper and more convenient than dealing with safety risks and damage later on. When to Call a Plumber Instead You might be able to handle an RO system installation, but part of the process is knowing when to ask for help. Here are the situations where calling a plumber is necessary to prevent expensive mistakes or major damage: You need to drill into granite, quartz, or natural stone countertops. Your plumbing system is old and outdated (maybe with galvanized pipes). The shutoff valves are not standard or damaged in some way. There is no GFCI outlet near your required location for a tankless RO unit. The landlord or inspector insists upon professional installation. You don’t feel equipped to handle the work. Troubleshooting After Installation Leak at Feed Adapter or Fittings Tighten each fitting around a quarter turn beyond hand-tight. If the leak is still there, disconnect the fitting and check the placement of the washer and O-ring. Re-install the system carefully and try running the water again. Slow Flow at RO Faucet For tank systems, the tank pressure should be 5-7 psi when empty. If the pressure is too low, use a pump to get it within the right range. For tankless models, clogged pre-filters or kinked tubing are usually the reason behind a slow flow. Inspect the system closely for these issues and correct them. Milky or Cloudy Water Getting cloudy water is normal and expected during the first 24–48 hours after a reverse osmosis filter installation. It’s usually because of trapped air and should clear up in about two days to a week. If the cloudiness is still there after a week, get in touch with the manufacturer’s technical support. Error Code on Display (Tankless Only) Check the owner’s manual for error code definitions. The most common ones are: E1: Low feed pressure E2: High incoming TDS E3: Membrane replacement required For more guidance about clean drinking water and residential water quality, take a look at the homeowner resources provided by the Centers for Disease Control and Prevention (CDC). Maintenance Schedule After Installation Component Frequency DIY? Sediment + carbon pre-filters Every 6–12 months Yes (5 min) RO membrane Every 2–3 years Yes (10 min) Post-filter Every 12 months Yes (5 min) Tank pressure check Annually Yes (bike pump) Sanitize system Annually Yes (bleach flush) Frequently Asked Questions Can a complete beginner install an RO system? As long as you can follow instructions and use a wrench, RO water filter system installation is possible for any beginner. There’s no plumbing experience necessary if you have the correct outlet already installed. How long does installation really take? Installation usually takes 2-4 hours for a tank-style system and 1.5-5 hours for a tankless model. If you’ll need a countertop hole, it’ll take additional time to drill one. What if I rent? Can I still install an RO system? Renters require permission from their landlord before installing an RO system. Drilling a hole for the faucet may not be allowed, so consider countertop RO setups as a suitable alternative. Does DIY installation void the warranty? No, illi water systems are developed especially for DIY installation. Our systems come with a warranty that covers all manufacturing defects. What if I damage something during install? Contact illi water’s customer support immediately in case of any damage. We stock most of the replacement parts for our current systems. It’s quite affordable to replace any tubing or fittings in our RO systems. Can I install a tankless system without an electrician? You’ll need a professional electrician to install a GFCI outlet under the sink for your tankless system. If the required outlet is already there, an electrician is not absolutely required. You’ve Got This! Ready to Start? Now that you have learned how to install a reverse osmosis system, you know it is really not that complicated. In fact, it is one of the most approachable DIY plumbing projects for many homeowners. Most of illi water’s clients complete the installation in the span of an afternoon, armed with just the basic tools and included instructions. If you follow this guide down to the T, you’re ready to attempt the installation. Just be sure to take your time and double-check every fitting and tubing connection. Your reward for all the hard work? A high-performing RO system providing years of clean, filtered, great-tasting water with just minimal maintenance each year. Ready to start? Take this quick system quiz by illi water to find the right RO system for your home.
Learn more
FAQs
What's the difference between the Standard, Pentair, and Tankless reverse osmosis systems?
The main differences come down to filtration stages, flow rate, and features. The Standard RO System is the most budget-friendly option at $379.99, with 5–7 customizable stages and a storage tank. The Pentair RO System at $729.99 adds NSF/ANSI triple certification, a 41% water recovery rate, and tool-free cartridge changes. The Tankless RO System at $1,299.99 is the premium choice, with no storage tank, 800 GPD flow rate, alkaline remineralization, and a smart digital faucet that shows your water's TDS in real time.
Do all your reverse osmosis systems remove PFAS, lead, and microplastics?
Yes, all three reverse osmosis systems remove up to 99% of common contaminants, including PFAS, lead, chlorine, and microplastics. Each system uses a semi-permeable RO membrane that filters on a near-molecular level, stopping dissolved solids that basic filters simply can't catch. The Tankless model also adds UV sterilization to reduce bacteria and viruses by 99.9%.
Are these reverse osmosis systems hard to install under the sink?
None of them requires a plumber. All three systems are designed for DIY under-sink installation with push-fit connections, pre-installed filter cartridges, and step-by-step instructions included in the box. The Tankless model can be set up in around 30 minutes; the Standard and Pentair models are similarly straightforward to set up. If you'd prefer professional help, illi Water can connect you with certified installers across Canada.
How much does it cost to maintain a reverse osmosis system each year?
Annual maintenance typically runs between $100 and $200 CAD, covering pre-filter and post-filter replacements every 6–12 months and an RO membrane replacement every 2–3 years. All three systems use easy-access, tool-free cartridges to keep servicing quick and mess-free. That's significantly less than the $600–$900 most Canadian households spend on bottled water each year.
What's your return policy if the system doesn't work for my home?
Every reverse osmosis system comes with a 90-day satisfaction guarantee if you're not happy with it for any reason. Return it within 90 days for a full refund. All systems are also covered by a 5-year warranty against defects in materials and workmanship. Shipping is free across Canada on every order, and refunds are processed within 5–10 business days of inspection.
Which reverse osmosis system is best for a small apartment or condo?
Any of our under-sink RO systems will work in a small kitchen; all three are compact and designed to tuck neatly inside a standard cabinet. If the space under the sink is especially tight, the Tankless RO System is the best fit, as it eliminates the storage tank entirely, freeing up roughly 4 square feet of cabinet space.